MMM...My new favorite Chocolate Chip Cookie Recipe!
I believe they go by the name Neiman Marcus Cookies or Million Dollar Cookies.....but they are basically a Chocolate Chip Cookie with Oats. The oats gives it a really nice texture and some extra nutrients (yeah right we are talking cookies here). The recipe also makes A BUNCH! The recipe that I pulled of the net said that it would make 50-80 cookies which translates into 4-6 dozen....they must be making awlful big cookies because I got 10-13 dozen out of mine! Considering I am making, at last count, 90 dozen cookies this week....yes I am a little nutty! A recipe that makes that many was excellent!
Neiman Marcus Chocolate Chip Cookies
2 cups butter (I used 1 cup of butter and 1 cup margerine)
2 cups white sugar
2 cups brown sugar
4 eggs
2 tsp. vanilla
5 cups oatmeal
4 cups flour
2 tsp. baking soda
2 tsp. baking powder
1 tsp. salt
24 oz. Chocolate Chips (two packages)
3 cups chopped nuts (optional)
1 8 oz. chocolate bar (optional)
Bleand oats in food processor or blender until a fine powder. Mix with flour, soda, baking powder, and salt, set aside!
Cream butter and both sugars. Add eggs and vanilla. Stir in dry ingredients. Add chocolate chips, shaved chocolate and nuts. Roll into balls. (I used my small scoop) Bake on ungreased cookie sheet for 10 minutes @ 375 degrees.
Mama D's Cookie Making Tips
Parchment Paper is awesome! From someone who hates clean up...this makes it easy and one sheet will last until you are done baking!
A small scoop is mandatory in my kitchen....it keeps my cookies the same size...you can use it one handed...and for those cookies you roll into a ball you can get them done up ahead of time, then all you have to do is roll them in sugar!
Monday, February 7, 2011
Sunday, February 6, 2011
Meal Plan for 2/6 to 2/12
It's been quite a week around here. We got some major snow on Monday night and have been "almost" housebound since then. They cancelled school all week long and my Bear has a major case of Cabin Fever!
We also have a couple new additions to our "family". Bob, the Rooster came home with my husband last weekend...my daughter has fallen in love...and tells me frequently that I can't fry Bob, "He's a good chicken, Mama!" My soft hearted family!!!
Also coming into the family is a calf that was orphaned on Wednesday. She is taking her bottle like a good girl and now thinks I am her Mama....and you wonder why my nickname is Mama D!!! We are not naming her yet, but she will likely get dubbed before it is all said and done.
My menu plan gave me trouble this week....I had too many things that need mashed potatoes as a side...so I did a little rearranging and hope I have time to cook all this! I am gonna be doing a lot of baking this week for some friends so be prepared for post on my favorite cookie recipes and some variations on my homemade bread!
Sunday - Frito Pies with homemade Chili
Monday - German Potato Soup, Cornbread
Tuesday - Golden Mushroom Meatballs, Mashed Potatoes, Green Beans, Wednesday - Rotisserie Chicken, Baked Potatoes, Peas and Carrots
Thursday - Spaghetti, Corn on Cob, Garlic Bread
Friday - Pizza Night
Saturday - Leftovers
Hope you have a great and wonderful week!
God Bless, Mama D
Saturday, February 5, 2011
Pork Tenderloin
 |
| Grilled Pork Tenderloin, Baked Potatos, Corn, Broccoli and Cheese |
This pork tenderloin was easy to make and you can put whatever side that you want with it.
Now if you have never cooked pork tenderloin before please listen carefully....toward the fat end of the tenderloin (normally come two to a package) there is this white shiney layer of something, sometimes it is covered by a thin layer of fat. You want to very carefully trim that off. You can't chew it, it makes it hard to cut the meat...it is just generally unneccessary. So take a thin knife (I find a filet knife works best), start at the narrow end and just shave it off.
Ok...that is the only difficult part of preparing pork tenderloin. I placed mine in my favorite meat marinade (post on that at a later date) in a ziploc bag for about 30 minutes while I did my dishes (my never ending task).
 |
| Potato Bag |
 |
| Cast Iron Grill Pan |
I heated my grill pan, till it was piping hot...about 10 minutes on medium low heat! Then I seared each side of my pork for about 5 minutes each. I then placed both of the pork tenderloin in a 9x13 casserole dish and baked it in the oven for 30 minutes at 350 degrees.
After removing it from the oven I let the meat rest for about 10 minutes.
 |
| Sliced Pork Tenderloin |
God Bless,
Mama D
Wednesday, February 2, 2011
Chocolate Chip Cookie Bars vs. Giant Breakfast Cookies
 |
| Chocolate Chip Cookie Bars vs. Giant Breakfast Cookies |
The conclusion that I came too...these are two totally different equally delicious recipes. The Giant Breakfast Cookie is a wholesome, healthy (but don't tell the kids) cookie shaped muffin. It has a soft cake like texture with the little bits of sweetness provided by the chocolate chips (you can also use raisins).
Since I am new to the blog world I really don't know if it is polite to share other people's recipes without their permission????? So until I know for sure, I don't want to offend anyone...if you want Laura's recipe...Google, Heavenly Homemakers and look up her Giant Breakfast Cookie under recipes!
My recipe for Chocolate Chip Cookie Bars you are most welcome to and I hope you try and enjoy it for many years to come. I tend to make this recipe instead of traditional cookies. I mean it's a cookie bar! You put it in a pan and bake for 25 minutes....then cut it into small pieces...so much easier than baking 4 dozen cookies! This is one of my Momma's favorites!
My Momma came walking in my house the other day with 2 bags of flour, a canister of oatmeal and a bag of brown sugar. I just looked at her and asked why she was bringing me the main ingredients to My Man's Cookies!!! She just laughed and said that the brown sugar would go really well in Chocolate Chip Cookie Bars too! I always like groceries....especially when I don't have to go and buy them!
Now the recipe....
Chocolate Chip Cookie Bars
 |
| The Ingredients |
2 cups packed brown sugar
1 tsp. vanilla
1 3/4 cup flour, sifted
1 1/2 tsp. baking soda
1/2 tsp. salt
3 eggs
1/2 cup chopped nuts (optional)
2 cups of chocolate chips
Melt your shortening. I have found that if you use a glass measuring cup that shortening measures out the same in it's solid form as it does in it's liquid....so save yourself some aggravation and just measure your shortening into you measuring cup and microwave it!
 |
| Brown sugar and melted shortening. |

 |
| Bear helping Mama grease the pan |
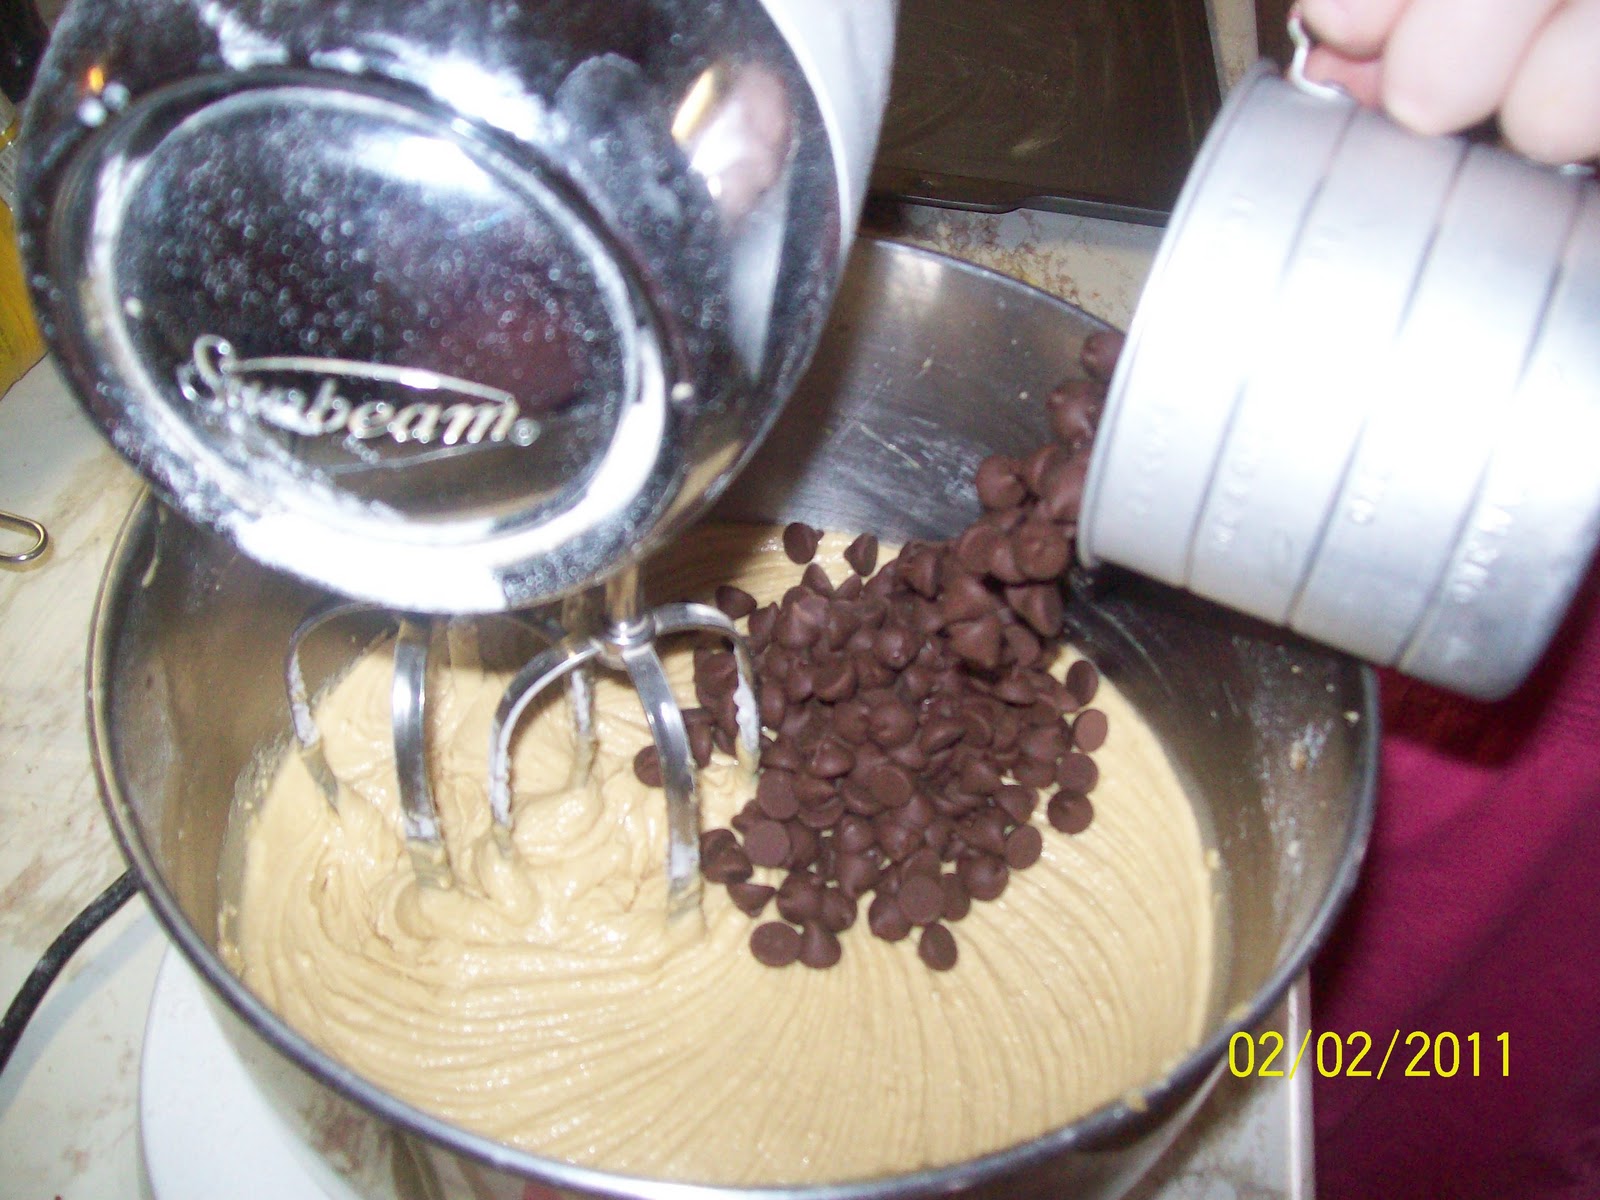 |
| And pouring in the chocolate chips after sneaking a few! |
 |
| Spreading them in the pan. |
 |
| The hard part is letting them cool enough to cut and eat! |
God Bless, Mama D
Tuesday, February 1, 2011
Garfield Day - Lasagna
Well folks...I did quite a bit of cooking yesterday....I decided since the weather was gonna be iffy today that I would go ahead and cook what I had planned for today....and that way it would be ready to go if we did lose power. Did you know that you can reheat Lasagna in a skillet??? All you have to do is cut it in bite sized pieces and reheat....it tastes better than microwaving it!
Of course the draw back of cooking all that food was my Bear decided she was starving and just had to have some of Mama's Lasagna before she went to bed.....which I gave her a small serving with the promise of more today! I told her she was gonna turn into Garfield if she ate anymore!
This is a wonderful make ahead recipe...if you are having company it will store in the refrigerator for a couple of days. What.I do is double my recipe...it doesn't take more time just a little more effort...and I put one in the freezer for later. I have even been known to make several smaller servings and share with my brother, who loves to come home and take home my freezer meals. Here lately I have been making small versions of my favorite meals and selling them to my friends who don't like to cook or just like a little help in that area from time to time!
Lasagna is fairly simple even though the instructions can get complicated at times....the ones on the back of the boxes always make my eyes cross. So hopefully my explanation will be a little easier to follow.
1/2 cup onion, chopped
1/2 cup bell pepper, chopped
2 or 3 jars of Spaghetti Sauce (the Tool Man claims that a combination of Prego and Ragu is the best...but use whatever you like or make homemade)
1 - 15 oz container Ricotta Cheese
1 Egg
1 Tbsp. Italian Seasoning
1 pkg. Parmesan or Italian Blend Cheese
1 Pkg. Mozzarella Cheese
1 box of Ready To Bake Lasagna Noodles
Ok because I made a double batch there is more here than what you would use in a normal recipe.....I didn't take a picture of the meat that I had already browned or the extra spaghetti sauce that I added....some things just get redundant!!!
1. Brown you ground beef with you onions and bell pepper. Season with salt and pepper to taste. Drain the grease and add your pasta sauces to heat.
2. Now you need to mix up your cheese layer ingredients. In a medium sized bowl mix Ricotta Cheese, egg, 1 tbsp Italian Seasoning, and about 1/2 to 1 cup Parmesan Cheese. If you don't have ricotta cheese you can substitute cottage cheese...if you want the finer consistency of ricotta run your cottage cheese through a food processor.
Ok now you can assemble your Lasagna. When choosing a pan be sure it deep.....it needs to have at least 3 or 4 inch sides.
3. Start with a layer of sauce on the bottom of the pan. Top with three of you pasta sheets. I personally love the ready to bake Lasagna noodles...it saves a step in the cooking process, I don't have another pan to wash and you don't have to struggle with slippery pasta.
4. Divide your Cheese mixture into thirds...and spread 1/3 of the mixture over the pasta sheets.
5. Next you want to spread a layer of your pasta sauce over the cheese layer. I find a soup ladle to be extremely helpful for this process.
6. Now sprinkle on a combination of your cheeses. I normally use a handful of each...but I like cheese so I tend to be generous on this issue.
7. Now start all over again with a layer of your pasta sheets. Repeat steps 4, 5, and 6 twice more.
8. You can either stop here or I add another layer of pasta sheets, topped with whatever sauce is left and the remaining cheese.
This is what I managed to make with the ingredients that I had. The big casserole I baked and divided between my crew and my Momma and Daddy down the road (Lil' Sister and Grandma live down there, too!) . Two of the smaller (2 serving pans) went in the freezer and one went in the oven with my big pan. One of my friends likes hers where she can just reheat it for lunch.
9. Bake your dish, uncovered in a 350 degree oven for 30 minutes! If you choose to refrigerate or freeze this, you are gonna need to let it cool completely and then wrap with foil and mark with instructions.
We keep this meal simple...I normally make some whole kernel corn or corn on the cob, a green salad and garlic bread....wish I had a picture of that! Like I said yummy and guaranteed to make any kid into a Garfield!
Happy cooking and God Bless, Mama D
Of course the draw back of cooking all that food was my Bear decided she was starving and just had to have some of Mama's Lasagna before she went to bed.....which I gave her a small serving with the promise of more today! I told her she was gonna turn into Garfield if she ate anymore!
This is a wonderful make ahead recipe...if you are having company it will store in the refrigerator for a couple of days. What.I do is double my recipe...it doesn't take more time just a little more effort...and I put one in the freezer for later. I have even been known to make several smaller servings and share with my brother, who loves to come home and take home my freezer meals. Here lately I have been making small versions of my favorite meals and selling them to my friends who don't like to cook or just like a little help in that area from time to time!
Lasagna is fairly simple even though the instructions can get complicated at times....the ones on the back of the boxes always make my eyes cross. So hopefully my explanation will be a little easier to follow.
Homemade Lasagna
1 lb. ground meat (I used beef....but adding in some sausage works well too)1/2 cup onion, chopped
1/2 cup bell pepper, chopped
2 or 3 jars of Spaghetti Sauce (the Tool Man claims that a combination of Prego and Ragu is the best...but use whatever you like or make homemade)
1 - 15 oz container Ricotta Cheese
1 Egg
1 Tbsp. Italian Seasoning
1 pkg. Parmesan or Italian Blend Cheese
1 Pkg. Mozzarella Cheese
1 box of Ready To Bake Lasagna Noodles
 |
| My Ingredients |
1. Brown you ground beef with you onions and bell pepper. Season with salt and pepper to taste. Drain the grease and add your pasta sauces to heat.
 |
| These are blended for your cheese layer |
 |
| Ricotta Cheese Mixture |
3. Start with a layer of sauce on the bottom of the pan. Top with three of you pasta sheets. I personally love the ready to bake Lasagna noodles...it saves a step in the cooking process, I don't have another pan to wash and you don't have to struggle with slippery pasta.
4. Divide your Cheese mixture into thirds...and spread 1/3 of the mixture over the pasta sheets.
 |
| Cheese Mixture Layer |
 |
| Pasta Sauce Layer |
 |
| Grated Cheese Layer |
8. You can either stop here or I add another layer of pasta sheets, topped with whatever sauce is left and the remaining cheese.
 |
| Before baking. |
9. Bake your dish, uncovered in a 350 degree oven for 30 minutes! If you choose to refrigerate or freeze this, you are gonna need to let it cool completely and then wrap with foil and mark with instructions.
 |
| Yummy!!! Garfield Food! |
Happy cooking and God Bless, Mama D
Homemade Beef Stew
 |
| Homemade Beef Stew with Cornbread |
The other day The Pioneer Woman, Ree, posted a recipe for Beef Stew with Paprika.....this looked very interesting to me! I love Beef Stew...it's so simple and hearty...and I happen to have lots of steak in my freezer that I am trying to repurpose....we just can't eat that much steak in a year! So this is my version of Ree's Beef Stew!
Beef Stew Mama D Style
2 Tbsp olive oil
2 Tbsp butter
2-5/8" thick chuck steaks (you could substitute stew meat)
1/2 onion, chopped
1/2 green bell pepper, chopped
1 or 2 garlic cloves, minced
2 cups water
2 tsp Beef Base (or two beef Bouillon cubes)
1 bottle beer (or can)
1 Tbsp Worchestershire Sauce
1 tsp. cumin
4 to 6 carrots, peeled and diced
4 to 6 potatoes peeled and diced (or use red potatoes and just wash and dice)
1 can tomato sauce
Heat your olive oil and butter in a dutch oven (some people call this a spaghetti pot, stock pot....whatever works for you...as long as it has a lid!)
 |
| Cut up chuck steak |

 |
| Chopped Onion and Bell Pepper |
You want to throw those in the pot that you just removed the meat from...be sure and scrape up all those little stuck on pieces of meat on the bottom of the pan while you are stirring, they add lots of good flavor to your stew. Let this cook until you veggies are nice and soft.
 |
| Softening those veggies. |
At this point we are gonna start adding some flavorings.

Now for the last step. You need to add the rest of your veggies. The way I determined my veggie count was by the number of people I was feeding....when you are making soup the veggies are what makes that meat stretch....so my rule of thumb is one veggie per person. So since I have four people in my family I used 4 carrots and 4 potatoes for my stew.
 |
| Four peeled and diced Carrots |
 |
| Four Peeled and Diced Potatoes |
Add those to your pot with a can of tomato sauce....if you need to add a little more water go ahead.
 |
| Adding Tomato Sauce |
 |
| Giving it a good stir before cooking veggies! |
I hope all you folks stay warm and safe! God Bless, Mama D
What to do with leftover Mashed Potatos Idea #2
 |
| Country Food! |
My main focus for this meal was using up the last of those left over mashed potatoes before they went bad.
Potato Cakes
however much left over mashed potatoes you happen to have....I had about 2 cups worth
1 egg (to hold it together)
about 1/4 cup of flour (to make it a little stiff)
salt and pepper to taste
Mix all of this in a bowl.....I just mixed it up in the container I had it stored in! Drop onto a hot skillet that you have melted about a tablespoon of butter in....yes I said butter pull it out, enjoy the flavor, your not using that much, it will make them taste right!!! Brown you blobs on both sides and serve with ketchup (that's how I got Bear to eat hers!!). Of course when I got done cooking the potato cakes, I added a bit of bacon drippings to my pan and fried up that sliced ham!! Country food is the best!!!
 |
| Potato Cakes Fried in BUTTER! |
Subscribe to:
Posts (Atom)