Baking Your Bacon
Now I have a short story to tell you....I used to work at a local convenience store that had a small deli counter/burrito counter attached to it! The burrito counter specialized in homemade tortilla, breakfast and lunch burritos! I worked on the other side making sandwiches, slicing deli meat and cheeses and making hamburgers, BUT when the burrito side needed help....I normally got to do the grunge work! Now the burrito side was staff by a very cool group of Hispanic ladies! All but one of them was shorter than I am and every single one of them could run circles around me working!
What they didn't know was that while the were running circles around me and having me do grunt work....I was watching and learning! Now their breakfast burritos are the best that money can buy in this area! The combination includes bacon, sausage, ham, eggs, fried potatoes, homemade pico de gallo and homemade hot sauce! All of which I either prepped for cooking or cooked for serving at one time or another!
One of the things that I remember the most...that I had never seen before was that they BAKED their bacon!?! And I thought that was the coolest thing that I had ever seen! I mean ...yeah it splatters all over your oven...but I would rather have nice evenly cooked bacon that I didn't have to stand over and get burnt by and clean my oven than the alternative!!! And it saves so much time!! You can have your bacon cooking while you make your other items on the menu!
So here is what I learned...
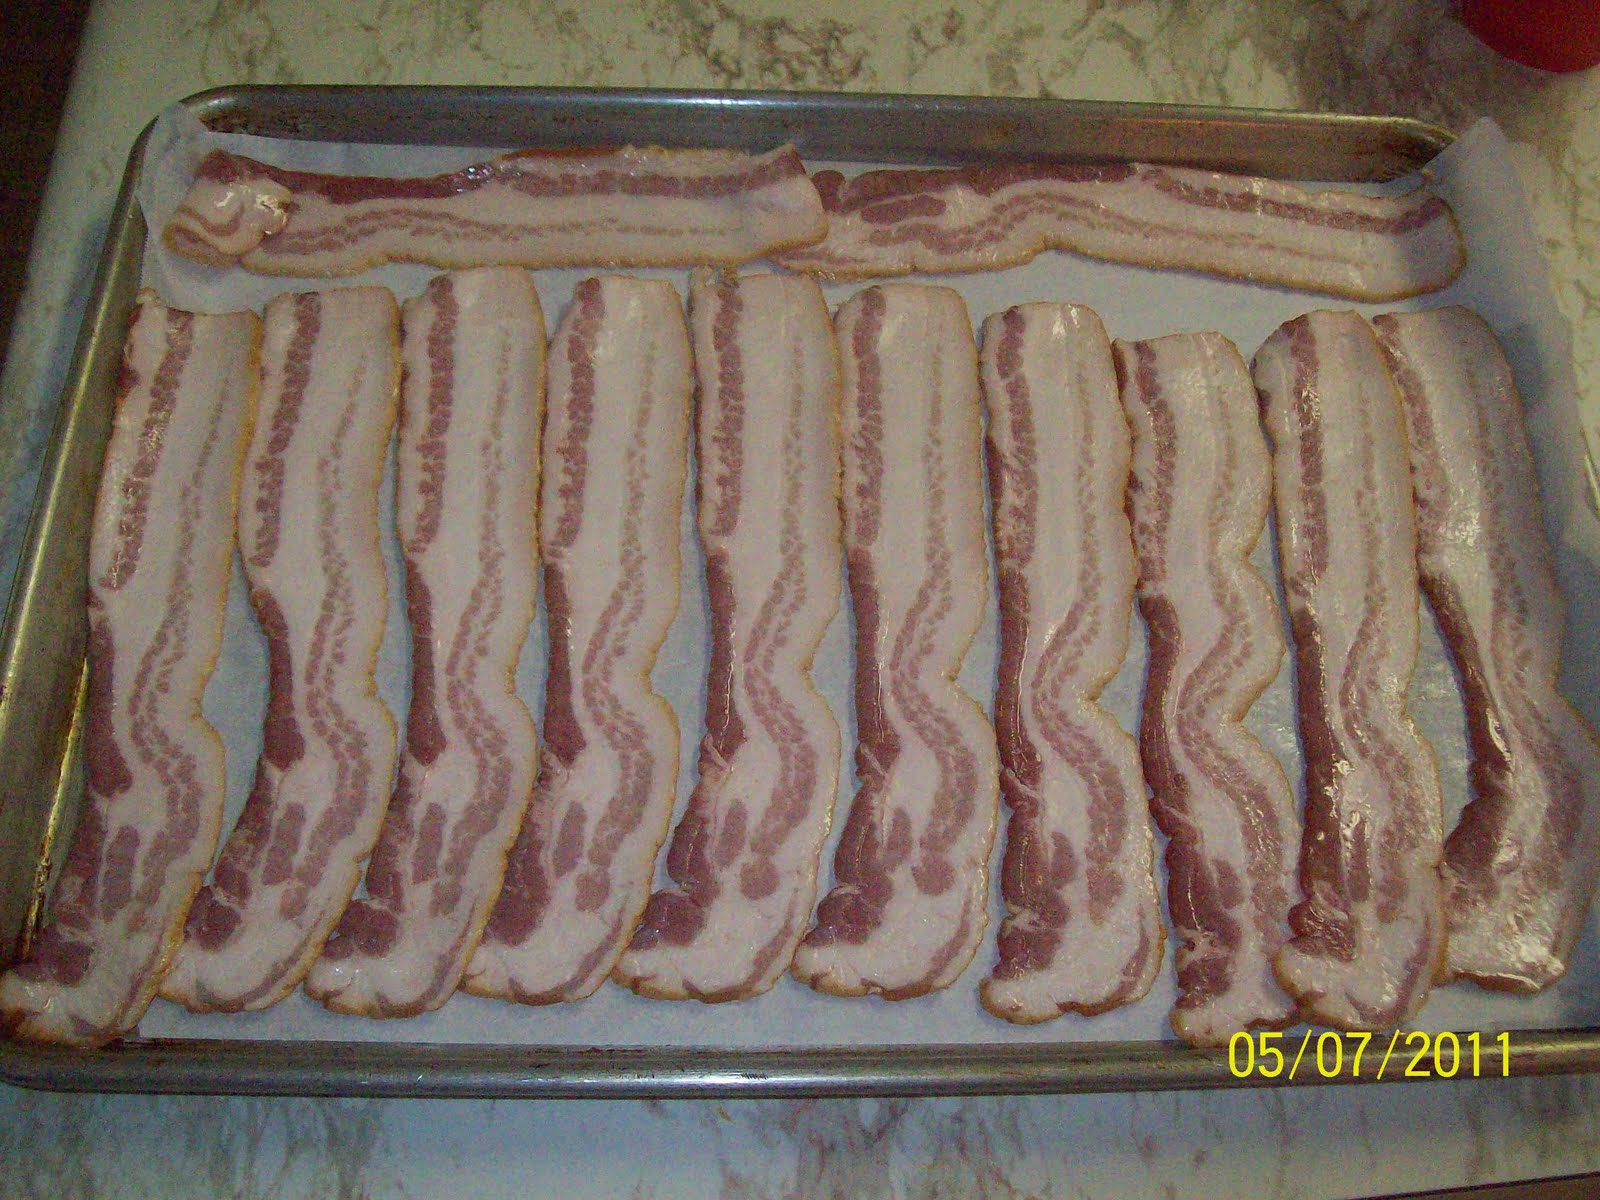
Line one jellyroll pan with parchment paper OR place one cooling rack on a jelly roll pan (I don't like cleaning the cooling rack afterwards, so I normally go with the parchment paper method).
Lay out one pound of bacon. (and it really doesn't matter if the bacon is touching or slightly over lapping...it's gonna shrink as it cooks)
Place in a pre-heated 350 degree oven for appox. 20-25 minutes! The amount of time depends on how you like your bacon!
We like ours full cooked...and a little on the soft side! I suggest you set your timer for about 15 minutes and check every couple of minutes until it reaches your preference!
Now remove from your pan and let drain on paper towels like normal!
I allow the grease to cool for a few minutes before pouring into my storage container for seasoning later! (yes I am an old fashioned cook that still uses bacon drippings as seasoning!)
Hope you have a great rest of the week!
God Bless,
Mama D
Tuesday, May 24, 2011
Wednesday, May 11, 2011
Deveiled Eggs
Devieled Eggs
Well considering I did my fair share of the cooking for Mother's Day...and I did some family faves. I thought I would share with you my recipe for devieled eggs. This is one of my husbands favorite treats when we have family meals. And I have to tell you this story....
When Tool Man and I were first married and having one of our first family get togethers...I was asked to make Deveiled Eggs. I of course did what I had always done when making deveiled eggs...when I got my yolk mixture made I took a small bite of it to the man of the house (I was used to this being my Daddy) to taste. Now my Daddy would have tasted the mixture and told me if I need to add anything to it before filling the egg white shells...salt, pepper, vinegar...I had made my mixture the way I had been taught. But that is NOT what my new husband did! He wanted me to fill an egg shell with a big ol' heaping spoonful of yolk...so that he could really see what they tasted like....then he proceeded to tell me they didn't taste right! He said and I quote, "They don't taste like Mom's." OK at this point most newly married wives would have broke down in tears...not me! I picked up the phone, called his Mother, told her what he had done and said (which she was appalled at!), once I got her to quit apologizing I asked her how she made her deveiled eggs so that I could adjust my recipe to make my new hubby happy! Come to find out it was really simple...she put a little sweet relish in hers and I had always used vinegar or dill pickle juice in mine.
So here is our version (a combination of mine and my sweet Momma-In-Laws) recipe for deveiled eggs!
Devieled Eggs
I made this recipe to feed 13 people. When I made these I always try to make an egg per person with a couple of extras just in case. I always have that one egg that won't peel pretty or splits down the middle...or that snitch that comes and wolfs down two or three before I even get them finished. I believe I ended up making 18 eggs for this batch.
Begin by boiling your eggs in salted water. The method I use for boiling eggs is pretty simple . I place all my eggs in a pan...size depends on how many eggs you are making...cover completely with water. Add 2 or 3 good pinches of salt. And turn on my on burner on medium to medium high heat. When water begins to boil I set my timer for 10 minutes. When timer goes off I turn the heat off on the stove. Now if I have the time I let them cool in the pan, drain the water and refrigerate over night. (They peel easier cold) But if I don't have time I drain the hot water and run cold water over until the eggs are cool enough to handle.
Then peel all of your eggs...rinse with cool water to remove any excess shells.
Cut each egg in half lengthwise and remove yolk. Place all your yolks in a bowl and place egg whites on your tray, plate....whatever you are using!
I use a fork to mash all of my yolks together, they should be very small crumbles! I then add a good layer of salt and pepper (appox. 1 tsp each). And mix!
I then add a heaping tablespoon of yellow mustard, a heaping tablespoon of Miracle Whip (or mayo...use what you prefer) and a tablespoon of sweet relish. I really don't measure this....you kind have to eyeball it...it all really depends on how much you are making....use less if you are making few eggs and vice versa!
Mix this well with a spoon or fork. It should have a paste like consistency. If it is too dry add a little more mustard or mayo, if you are still having issues add about a teaspoon of vinegar or the juice off of some dill pickles.
At this point I normally have someone taste test my mixture....adjust to your own preferences, just be careful not to let it get too dry or too runny!
Now because this was for Mother's Day and I wanted it to look nice...I used a pastry bag and tip to fill my eggs.
I am trying to show you in this pic to use a tip with a large opening! If not you will spend more time fighting the clumps of egg that didn't get completely mashed...than you will filling your whites! (personal experience and over 100 eggs to fill! I know what I am talking about!) You can use a Ziploc bag and tip or just a spoon to fill the whites...it's your choice and what you are comfortable with!
To finish sprinkle your eggs with Paprika! Or garnish of choice! I have always used paprika...but I have to leave a few eggs plain for my Grandma!
Enjoy! God Bless,
Mama D
Well considering I did my fair share of the cooking for Mother's Day...and I did some family faves. I thought I would share with you my recipe for devieled eggs. This is one of my husbands favorite treats when we have family meals. And I have to tell you this story....
When Tool Man and I were first married and having one of our first family get togethers...I was asked to make Deveiled Eggs. I of course did what I had always done when making deveiled eggs...when I got my yolk mixture made I took a small bite of it to the man of the house (I was used to this being my Daddy) to taste. Now my Daddy would have tasted the mixture and told me if I need to add anything to it before filling the egg white shells...salt, pepper, vinegar...I had made my mixture the way I had been taught. But that is NOT what my new husband did! He wanted me to fill an egg shell with a big ol' heaping spoonful of yolk...so that he could really see what they tasted like....then he proceeded to tell me they didn't taste right! He said and I quote, "They don't taste like Mom's." OK at this point most newly married wives would have broke down in tears...not me! I picked up the phone, called his Mother, told her what he had done and said (which she was appalled at!), once I got her to quit apologizing I asked her how she made her deveiled eggs so that I could adjust my recipe to make my new hubby happy! Come to find out it was really simple...she put a little sweet relish in hers and I had always used vinegar or dill pickle juice in mine.
So here is our version (a combination of mine and my sweet Momma-In-Laws) recipe for deveiled eggs!
Devieled Eggs
I made this recipe to feed 13 people. When I made these I always try to make an egg per person with a couple of extras just in case. I always have that one egg that won't peel pretty or splits down the middle...or that snitch that comes and wolfs down two or three before I even get them finished. I believe I ended up making 18 eggs for this batch.
Begin by boiling your eggs in salted water. The method I use for boiling eggs is pretty simple . I place all my eggs in a pan...size depends on how many eggs you are making...cover completely with water. Add 2 or 3 good pinches of salt. And turn on my on burner on medium to medium high heat. When water begins to boil I set my timer for 10 minutes. When timer goes off I turn the heat off on the stove. Now if I have the time I let them cool in the pan, drain the water and refrigerate over night. (They peel easier cold) But if I don't have time I drain the hot water and run cold water over until the eggs are cool enough to handle.
Then peel all of your eggs...rinse with cool water to remove any excess shells.
Cut each egg in half lengthwise and remove yolk. Place all your yolks in a bowl and place egg whites on your tray, plate....whatever you are using!
I use a fork to mash all of my yolks together, they should be very small crumbles! I then add a good layer of salt and pepper (appox. 1 tsp each). And mix!
I then add a heaping tablespoon of yellow mustard, a heaping tablespoon of Miracle Whip (or mayo...use what you prefer) and a tablespoon of sweet relish. I really don't measure this....you kind have to eyeball it...it all really depends on how much you are making....use less if you are making few eggs and vice versa!
Mix this well with a spoon or fork. It should have a paste like consistency. If it is too dry add a little more mustard or mayo, if you are still having issues add about a teaspoon of vinegar or the juice off of some dill pickles.
At this point I normally have someone taste test my mixture....adjust to your own preferences, just be careful not to let it get too dry or too runny!
Now because this was for Mother's Day and I wanted it to look nice...I used a pastry bag and tip to fill my eggs.
I am trying to show you in this pic to use a tip with a large opening! If not you will spend more time fighting the clumps of egg that didn't get completely mashed...than you will filling your whites! (personal experience and over 100 eggs to fill! I know what I am talking about!) You can use a Ziploc bag and tip or just a spoon to fill the whites...it's your choice and what you are comfortable with!
To finish sprinkle your eggs with Paprika! Or garnish of choice! I have always used paprika...but I have to leave a few eggs plain for my Grandma!
Enjoy! God Bless,
Mama D
Vanilla Update...and Smaller Recipe
Vanilla Update!
Well three months ago I made my first batch of homemade vanilla! I had been seeing recipes on the various blogs I follow for nearly a year....and I finally had the resources to start my first batch!
See I marked my kitchen calendar every month...so that I wouldn't forget to shake to jar (this was in my original instructions). However I have about decided that I need to put this notation on my desk calendar instead....I tend to look at that one daily...because I was busy outside all day I didn't get to it until today. I also need to put thing like when to water my plants down on that calendar! My Momma has this master list of things that she does on a monthly basis and beyond....I really need to start paying attention to stuff like that!
My jar of vanilla after three months! As you can see I have been marking off the months on my label when I go shake/check on my jar! That was one of my more brilliant ideas!
Now....for the new recipe! One of the rather daunting things for me about making this vanilla was finding vanilla beans that I could afford, that were good quality and would make the amount of vanilla that was required in my recipe....my recipe calls for 3/4 of a pound of beans! And when you go shopping the recommended beans are quite expensive! Another issue that I thought of...the normal person that cooks is not going to be able to use a GALLON of vanilla very quickly! I mean seriously....even me, a person that makes most things from scratch and cooks on a daily basis doesn't use that much vanilla in a year. The only reason I was willing to make this much was because I know I will be using it for Christmas gifts!
BUT I was reading the Ma/June 2011 issue of Cooking with Paula Deen...and looky what I found!
The same recipe cut down to just a cup of vodka and 2 or 3 vanilla beans!!! Woo Hoo...I was excited! It just never occurred to me to cut the recipe down to a more workable size! And that other up side...you can buy 2 or 3 of the REALLY good vanilla beans for a WHOLE lot less than you can buy 50 or so that the big recipe calls for!
The only real difference that I saw in Paula's recipe was that mine recommend the vanilla stay in a cool dark place for 6 months....hers says 2! Basically everyone says something different....and the truth of the matter is...the longer the beans stay in the vodka...the better and stronger your vanilla is gonna be! And even with this recipe you would have enough to share with a friend!!! So if you weren't to keen on the whole gallon of vanilla thing and just want to experiment before you commit yourself... try the following recipe!!!
Homemade Vanilla Extract
1 cup vodka (remember it can be the cheap stuff)
2 to 3 vanilla beans, split lengthwise (leave about 1/2" at top so bean stays together)
In a clean glass bottle or jar with a tight-fitting lid, combine vodka and vanilla beans. Seal and place in a cool dark place for at least 2 months before use.
Credit-May/June 2011 issue Cooking with Paula Deen
MMmmm...I am wondering if there are other extracts you can make homemade...gonna have to do some research! Anyone have any recipes???
God Bless,
Mama D
Well three months ago I made my first batch of homemade vanilla! I had been seeing recipes on the various blogs I follow for nearly a year....and I finally had the resources to start my first batch!
See I marked my kitchen calendar every month...so that I wouldn't forget to shake to jar (this was in my original instructions). However I have about decided that I need to put this notation on my desk calendar instead....I tend to look at that one daily...because I was busy outside all day I didn't get to it until today. I also need to put thing like when to water my plants down on that calendar! My Momma has this master list of things that she does on a monthly basis and beyond....I really need to start paying attention to stuff like that!
My jar of vanilla after three months! As you can see I have been marking off the months on my label when I go shake/check on my jar! That was one of my more brilliant ideas!
Now....for the new recipe! One of the rather daunting things for me about making this vanilla was finding vanilla beans that I could afford, that were good quality and would make the amount of vanilla that was required in my recipe....my recipe calls for 3/4 of a pound of beans! And when you go shopping the recommended beans are quite expensive! Another issue that I thought of...the normal person that cooks is not going to be able to use a GALLON of vanilla very quickly! I mean seriously....even me, a person that makes most things from scratch and cooks on a daily basis doesn't use that much vanilla in a year. The only reason I was willing to make this much was because I know I will be using it for Christmas gifts!
BUT I was reading the Ma/June 2011 issue of Cooking with Paula Deen...and looky what I found!
The same recipe cut down to just a cup of vodka and 2 or 3 vanilla beans!!! Woo Hoo...I was excited! It just never occurred to me to cut the recipe down to a more workable size! And that other up side...you can buy 2 or 3 of the REALLY good vanilla beans for a WHOLE lot less than you can buy 50 or so that the big recipe calls for!
The only real difference that I saw in Paula's recipe was that mine recommend the vanilla stay in a cool dark place for 6 months....hers says 2! Basically everyone says something different....and the truth of the matter is...the longer the beans stay in the vodka...the better and stronger your vanilla is gonna be! And even with this recipe you would have enough to share with a friend!!! So if you weren't to keen on the whole gallon of vanilla thing and just want to experiment before you commit yourself... try the following recipe!!!
Homemade Vanilla Extract
1 cup vodka (remember it can be the cheap stuff)
2 to 3 vanilla beans, split lengthwise (leave about 1/2" at top so bean stays together)
In a clean glass bottle or jar with a tight-fitting lid, combine vodka and vanilla beans. Seal and place in a cool dark place for at least 2 months before use.
Credit-May/June 2011 issue Cooking with Paula Deen
MMmmm...I am wondering if there are other extracts you can make homemade...gonna have to do some research! Anyone have any recipes???
God Bless,
Mama D
Monday, May 9, 2011
Mother's Day and A Day Working Cows!
Well Happy Mother's Day to all my fellow Mama's out there! I must say I had a great one!!! I spent most of the day Saturday cooking so that I could spend Sunday visiting and enjoying the day! My sweet hubby and baby Bear let me sleep in while they ran to Wal-Mart to pick out gifts and run by my favorite donut shop for breakfast! I then loaded up my van with all the goodies I had made on Saturday and headed to MY Momma's house to visit with her, my Grandma, Aunt Flossie, Uncle Monroe, Uncle David and cousin Billy Jack! We had lots to be thankful for and lots of people to fellowship with! It sure did help that Momma and I learned a long time ago to share the cooking responsibilities when we have lots of family in like that!
I even managed to wake up to an entirely clean kitchen on Mother's Day(I am not real good about keeping up with my dishes....I tend to clean Before I cook instead of After!), so waking up to all my dishes clean and them staying clean all day was really a treat for me! And I have some really cool pics...but I left my camera over at my Momma's house! I also took pics of all the cool things that I cooked on Saturday so that I could share them with you this week....and guess where all the pics are!?! So I will get my camera from my Momma in the morning and hopefully have some cool cooking posts to share with you the remaining of the week!
Today I had a entirely new experience.... I would describe myself as a girly country girl to most folks! I grew up with the mentality that when the menfolk were out working, I was to provide cold drinks and good hot food when they decided to come in the house...and otherwise keep myself in the house and out of earshot and harms way! Well things have changed around here and it is not like that anymore. I personally know one very amazing woman (whom I had the pleasure of working with today) that can work side by side with her husband and is not afraid of hard work. My own husband is slowly but surely encouraging me to be an active part of our family farm operation. Today I got to see first hand what all goes on vaccinating the cows and calves, as well as changing the bulls to steers!
This is one of our calves that got a little confused... I don't think he knew which way was up by this point!
I of course being 4 months pregnant was well protected while my husband, Daddy, and the couple that was kind enough to come and help us did all the hard work! I was given the task of keeping the paperwork from under a shade tree on a chair with a bottle of water! And my hubby and Daddy making sure I was okay ever so often! Everyone else did the hard work, while I sat on my tush! And then since it was supposed to hit over 100 degrees today I got sent in the house after about 4 hours! I also made it my job to make sure everyone stayed well hydrated! My guys tend to forget that little fact while out in the heat and then pay for it later...so whenever we had a break I put a bottle of water or Gatorade in their hands and made sure they drank!
When I got ran in the house I proceeded to set out lunch for everyone....sandwiches on homemade bread with all the fixing's! But I did find the whole process interesting! We (I say that very loosely) vaccinated all the cows, sprayed something in their ears and poured something on their backs! And that was the easy part! Then came the calves! Those had all that done to them, plus ear tags, and for all those little boys....well they got their minds changed for them....in the most humane way we possibly could! I am kinda glad I was pregnant for this round and just had to watch! It was hot, sometimes scary, sometimes frustrating work....and I had the easy job! And to think we have to repeat everything here in a couple of weeks!
And the adventures at our little farm just keep getting more interesting! I sadly lost six of my chickens this weekend due to a very well fed cat! Luckily we figured out what was happening before it got out of hand! And have now "fixed" the problem!
Hoping and praying everyone has a wonderful and blessed week!
God Bless,
Mama D
I even managed to wake up to an entirely clean kitchen on Mother's Day(I am not real good about keeping up with my dishes....I tend to clean Before I cook instead of After!), so waking up to all my dishes clean and them staying clean all day was really a treat for me! And I have some really cool pics...but I left my camera over at my Momma's house! I also took pics of all the cool things that I cooked on Saturday so that I could share them with you this week....and guess where all the pics are!?! So I will get my camera from my Momma in the morning and hopefully have some cool cooking posts to share with you the remaining of the week!
Today I had a entirely new experience.... I would describe myself as a girly country girl to most folks! I grew up with the mentality that when the menfolk were out working, I was to provide cold drinks and good hot food when they decided to come in the house...and otherwise keep myself in the house and out of earshot and harms way! Well things have changed around here and it is not like that anymore. I personally know one very amazing woman (whom I had the pleasure of working with today) that can work side by side with her husband and is not afraid of hard work. My own husband is slowly but surely encouraging me to be an active part of our family farm operation. Today I got to see first hand what all goes on vaccinating the cows and calves, as well as changing the bulls to steers!
This is one of our calves that got a little confused... I don't think he knew which way was up by this point!
I of course being 4 months pregnant was well protected while my husband, Daddy, and the couple that was kind enough to come and help us did all the hard work! I was given the task of keeping the paperwork from under a shade tree on a chair with a bottle of water! And my hubby and Daddy making sure I was okay ever so often! Everyone else did the hard work, while I sat on my tush! And then since it was supposed to hit over 100 degrees today I got sent in the house after about 4 hours! I also made it my job to make sure everyone stayed well hydrated! My guys tend to forget that little fact while out in the heat and then pay for it later...so whenever we had a break I put a bottle of water or Gatorade in their hands and made sure they drank!
When I got ran in the house I proceeded to set out lunch for everyone....sandwiches on homemade bread with all the fixing's! But I did find the whole process interesting! We (I say that very loosely) vaccinated all the cows, sprayed something in their ears and poured something on their backs! And that was the easy part! Then came the calves! Those had all that done to them, plus ear tags, and for all those little boys....well they got their minds changed for them....in the most humane way we possibly could! I am kinda glad I was pregnant for this round and just had to watch! It was hot, sometimes scary, sometimes frustrating work....and I had the easy job! And to think we have to repeat everything here in a couple of weeks!
And the adventures at our little farm just keep getting more interesting! I sadly lost six of my chickens this weekend due to a very well fed cat! Luckily we figured out what was happening before it got out of hand! And have now "fixed" the problem!
Hoping and praying everyone has a wonderful and blessed week!
God Bless,
Mama D
Friday, May 6, 2011
Mother's Day Gift!
Well as Mother's Day is coming in a few days...it's time that most people at least tell their Mother thank you for all that they are and have done in our lives! The older I get the more I appreciate and love my Momma! She is my best friend, my solid rock, my counselor, my greatest support system, my biggest cheerleader, my first love and so many other things that I would bore you to put them all on here! My Momma is very near and dear to my heart! We have had our normal family ups and downs, everyone does when somepeople have growing up to do (namely ME!) but through it all she is always there! So....that being said (wipe the little tear from your eye) I always like to do something special for my Momma for Mother's Day.
I will tell you my Momma is not an easy person to buy for! Run of the mill gifts just don't cut it with her! I mean cards, pretty flowers, balloons...she just looks at you and has this expression on her face like "I know I raise you with a more creative mind than that!" So my creative side tend to show and I always have to take my Momma's interests and hobbies into account when making her gifts!
I will tell you one thing...my Momma LOVES pictures! She was scrapbooking before scrapbooking was cool! She used to keep the wrapping paper from our birthdays and cut out cool things like Papa Smurf and Strawberry Shortcake to decorate our photo albums! And this year Momma requested that my brother, sister and I have group pictures made for her Mother's Day gift! Well due to life events and the fact that my brother lives 2 1/2 hours away....that hasn't happened yet.
She also loves flowers! But not the kind for in the house...she likes rose bushes for her flower beds around the house. And for the last couple of years I have bought her rose bushes for Mother's Day in different colors of course...I even put my brother and sister's name on the card (as Big Sis that's my job!). But this year I have already give her a rose bush for another reason...so I don't want to duplicate.
So what's a girl to do???
Well we wait for inspiration! And on Monday it came! I recieved a Mother's Day Gift Idea from the Pioneer Woman website!
This is a pendant called the Mother's Tree of Life. Each of the little beads represents your children and this is a pendant worn on a 18" chain. I thought this was cool...but not as jewelry...and of course my creative brain goes....I bet I can make that! I have wire, I have beads...all I need is a circle...mmmm....
So Mama D swings through the jewelry department at our local Wal-mart while grocery shopping and finds some really pretty bangle bracelets!
Now these came in a set...there were 2 wider and about 5 of the skinny one's like these...I went ahead and bought a little nicer set, because much to my delight I could actually fit my hand through the remaining braclets! (You discover cool stuff like that when you have lost alot of weight! It's really neat when it happens...I put them on and just jingled the rest of the day!)
I also went to my computer to do a little research! I knew just about everyone's birthstone in my family...but a couple of my guys! For some reason remembering my sister, mother and daughter's birthstone is easy....even my dads (mainly because it's also his favorite color!) But my brother and husband...I had never really thought about it! So...off I went!
Considering my Momma, I knew that just us kids would not be sufficent, #1 she would be insulted if I left off her grand babies, #2 my hubby Tool Man is just as much one of her kids as I am.....so I had to modify the concept of the Tree of Life. I made it more a family thing than a Mother's thing...but since I was making it...I could do that!
So I started out with about 10 pieces of sliver wire, cut about 12" long ( I wanted plenty of leeway) Now in my crafting I have found that you can't go wrong with a spool of silver floral wire. I can't afford to go the "real" sliver route, most of my stuff is what I can find locally, and considering it's not going to be worn, I really don't think it matters. However if you choose to make something similar...use what every you like or have available to you!
Sorry I forgot to turn the flash off on my camera...so the pics are not that great this time!
What is showing in this pic is that I started about 3" from the bottom of my wire and started wrapping one piece of the wire around the rest to form the trunk.
Not that you can see it...but I then separated my wire into twos, spread them out and wrapped them tightly around the bottom of my bangle bracelet. If you refer to the inspiration picture you will see the "roots" of the tree kinda spread out and it has all been wrapped as two pieces. Well I tried that, and thought it looked tacky, I tried doing two or three together and that looked tacky...I finally settled on just one strand at a time, working from the center out! the wrapping over lapped just a little, but not bad and I was able to control where my "roots" layed.
Okay...I now have my "roots" and my "trunk" all I need to add are the "branches"! First I strung beads representing my Momma and Daddy onto the trunk of the tree (because they are the base). Then I branched out with me and my hubby, on one set of branches, and our children on another, with my brother and sister completing the other side of the tree! This is were the creative part comes in...you try to make wire look like tree branches...doesn't really take skill...but it helps if you mess up a couple of times so that the wire is not straight! What you end up with is something that looks like this!
Now I left my wires in a manner that if Momma wants me to as we add members to our family we can add their bead! I already added the bead for our new little munchkin (due oct 17th)...but you know how kids are he/she may come in September or he/she could wait till November! Both kinda scary concepts for this Momma....but you never know???
The orginal inspriation piece was a piece of jewelry...as I used a bangle bracelet as the base...mine is a little big for that...so mine is meant as something to hang on a mirror or in a window! I am gonna let Momma decide what she wants to do with it and I will add the appropiate hanger! I see it with clear fishing wire hanging on her bathroom mirror so that she will see it everyday...or maybe suspended over the kitchen sink!
Now as my Momma is my biggest fan...and always reads my blog posts...I had to tell her she is not allowed to read this one till after Sunday lunch! It never fails that she and I cook together on Mother's Day! You would think our guys would have pity on us one year and cook for us!
Hope you have a wonderful Mother's Day Weekend! Oh this project only took me about 30 minutes to put together...so it would be great for one of those last minute gifts!!! Use your imagination and let what you have inspire you!
Total cost to me...not counting the materials I had on hand...about $8...but...I also got some really cool bangles out of the project!
God Bless!
Mama D
I will tell you my Momma is not an easy person to buy for! Run of the mill gifts just don't cut it with her! I mean cards, pretty flowers, balloons...she just looks at you and has this expression on her face like "I know I raise you with a more creative mind than that!" So my creative side tend to show and I always have to take my Momma's interests and hobbies into account when making her gifts!
I will tell you one thing...my Momma LOVES pictures! She was scrapbooking before scrapbooking was cool! She used to keep the wrapping paper from our birthdays and cut out cool things like Papa Smurf and Strawberry Shortcake to decorate our photo albums! And this year Momma requested that my brother, sister and I have group pictures made for her Mother's Day gift! Well due to life events and the fact that my brother lives 2 1/2 hours away....that hasn't happened yet.
She also loves flowers! But not the kind for in the house...she likes rose bushes for her flower beds around the house. And for the last couple of years I have bought her rose bushes for Mother's Day in different colors of course...I even put my brother and sister's name on the card (as Big Sis that's my job!). But this year I have already give her a rose bush for another reason...so I don't want to duplicate.
So what's a girl to do???
Well we wait for inspiration! And on Monday it came! I recieved a Mother's Day Gift Idea from the Pioneer Woman website!
This is a pendant called the Mother's Tree of Life. Each of the little beads represents your children and this is a pendant worn on a 18" chain. I thought this was cool...but not as jewelry...and of course my creative brain goes....I bet I can make that! I have wire, I have beads...all I need is a circle...mmmm....
So Mama D swings through the jewelry department at our local Wal-mart while grocery shopping and finds some really pretty bangle bracelets!
Now these came in a set...there were 2 wider and about 5 of the skinny one's like these...I went ahead and bought a little nicer set, because much to my delight I could actually fit my hand through the remaining braclets! (You discover cool stuff like that when you have lost alot of weight! It's really neat when it happens...I put them on and just jingled the rest of the day!)
I also went to my computer to do a little research! I knew just about everyone's birthstone in my family...but a couple of my guys! For some reason remembering my sister, mother and daughter's birthstone is easy....even my dads (mainly because it's also his favorite color!) But my brother and husband...I had never really thought about it! So...off I went!
Considering my Momma, I knew that just us kids would not be sufficent, #1 she would be insulted if I left off her grand babies, #2 my hubby Tool Man is just as much one of her kids as I am.....so I had to modify the concept of the Tree of Life. I made it more a family thing than a Mother's thing...but since I was making it...I could do that!
So I started out with about 10 pieces of sliver wire, cut about 12" long ( I wanted plenty of leeway) Now in my crafting I have found that you can't go wrong with a spool of silver floral wire. I can't afford to go the "real" sliver route, most of my stuff is what I can find locally, and considering it's not going to be worn, I really don't think it matters. However if you choose to make something similar...use what every you like or have available to you!
Sorry I forgot to turn the flash off on my camera...so the pics are not that great this time!
What is showing in this pic is that I started about 3" from the bottom of my wire and started wrapping one piece of the wire around the rest to form the trunk.
Not that you can see it...but I then separated my wire into twos, spread them out and wrapped them tightly around the bottom of my bangle bracelet. If you refer to the inspiration picture you will see the "roots" of the tree kinda spread out and it has all been wrapped as two pieces. Well I tried that, and thought it looked tacky, I tried doing two or three together and that looked tacky...I finally settled on just one strand at a time, working from the center out! the wrapping over lapped just a little, but not bad and I was able to control where my "roots" layed.
Okay...I now have my "roots" and my "trunk" all I need to add are the "branches"! First I strung beads representing my Momma and Daddy onto the trunk of the tree (because they are the base). Then I branched out with me and my hubby, on one set of branches, and our children on another, with my brother and sister completing the other side of the tree! This is were the creative part comes in...you try to make wire look like tree branches...doesn't really take skill...but it helps if you mess up a couple of times so that the wire is not straight! What you end up with is something that looks like this!
Now I left my wires in a manner that if Momma wants me to as we add members to our family we can add their bead! I already added the bead for our new little munchkin (due oct 17th)...but you know how kids are he/she may come in September or he/she could wait till November! Both kinda scary concepts for this Momma....but you never know???
The orginal inspriation piece was a piece of jewelry...as I used a bangle bracelet as the base...mine is a little big for that...so mine is meant as something to hang on a mirror or in a window! I am gonna let Momma decide what she wants to do with it and I will add the appropiate hanger! I see it with clear fishing wire hanging on her bathroom mirror so that she will see it everyday...or maybe suspended over the kitchen sink!
Now as my Momma is my biggest fan...and always reads my blog posts...I had to tell her she is not allowed to read this one till after Sunday lunch! It never fails that she and I cook together on Mother's Day! You would think our guys would have pity on us one year and cook for us!
Hope you have a wonderful Mother's Day Weekend! Oh this project only took me about 30 minutes to put together...so it would be great for one of those last minute gifts!!! Use your imagination and let what you have inspire you!
Total cost to me...not counting the materials I had on hand...about $8...but...I also got some really cool bangles out of the project!
God Bless!
Mama D
Friday, April 29, 2011
Proud Day For My Home Town
Today was a red letter day for my hometown! We were proud to host the First Lady of Texas Anita Perry! She was here to welcome us into the Texas Main Street Program. Something for which our town has been striving!
I was honored to play a small role in welcoming out First lady. I was asked to provide a tray of food for the reception held in Mrs. Perry's honor. After much deliberation and advice from family I decided on a tray of mini muffins. A smaller version of what I normally sell. I made Mini Banana Nut Muffins, Strawberry Nut Muffins and Mini Rolls.
After arranging and rearranging my tray and labeling everything I failed to take a photo....but I am sure that my friends here in our little town will let me know how it all worked out! I also intended on attending the ceremony, but this being Texas...the wind decided to blow all day! And my allergies being what they are ...even stepping outside to water my garden and feed and water the chickens gave me a terrible headache! So I decided that it would be best if baby bump and I just stayed home! I am looking forward to reading a full report in our Sunday's newspaper though!
Linky to Story
Above is a link to the story! Hope you enjoy!
God Bless,
Mama D
I was honored to play a small role in welcoming out First lady. I was asked to provide a tray of food for the reception held in Mrs. Perry's honor. After much deliberation and advice from family I decided on a tray of mini muffins. A smaller version of what I normally sell. I made Mini Banana Nut Muffins, Strawberry Nut Muffins and Mini Rolls.
After arranging and rearranging my tray and labeling everything I failed to take a photo....but I am sure that my friends here in our little town will let me know how it all worked out! I also intended on attending the ceremony, but this being Texas...the wind decided to blow all day! And my allergies being what they are ...even stepping outside to water my garden and feed and water the chickens gave me a terrible headache! So I decided that it would be best if baby bump and I just stayed home! I am looking forward to reading a full report in our Sunday's newspaper though!
Linky to Story
Above is a link to the story! Hope you enjoy!
God Bless,
Mama D
Saturday, April 23, 2011
Updated Garden Pics
Well I have been super excited this week because my garden is just sprouting away!!! I got out tonight and took some more pics because I am so proud! Also my Daddy bought me some tomato and pepper plants to replace those that I lost last week due to my lack of knowledge and the wind/sand storm we had! We took extra care and placed 5 gallon buckets with the bottom cut out around each little plant! Looks kinda funny but both my Daddy and Daddy In Law say that it will do the trick!
My Corn and Squash!!! Daddy planted the squash with the corn??? Said they could grown in the same row....I just think I am gonna have a lot of squash!
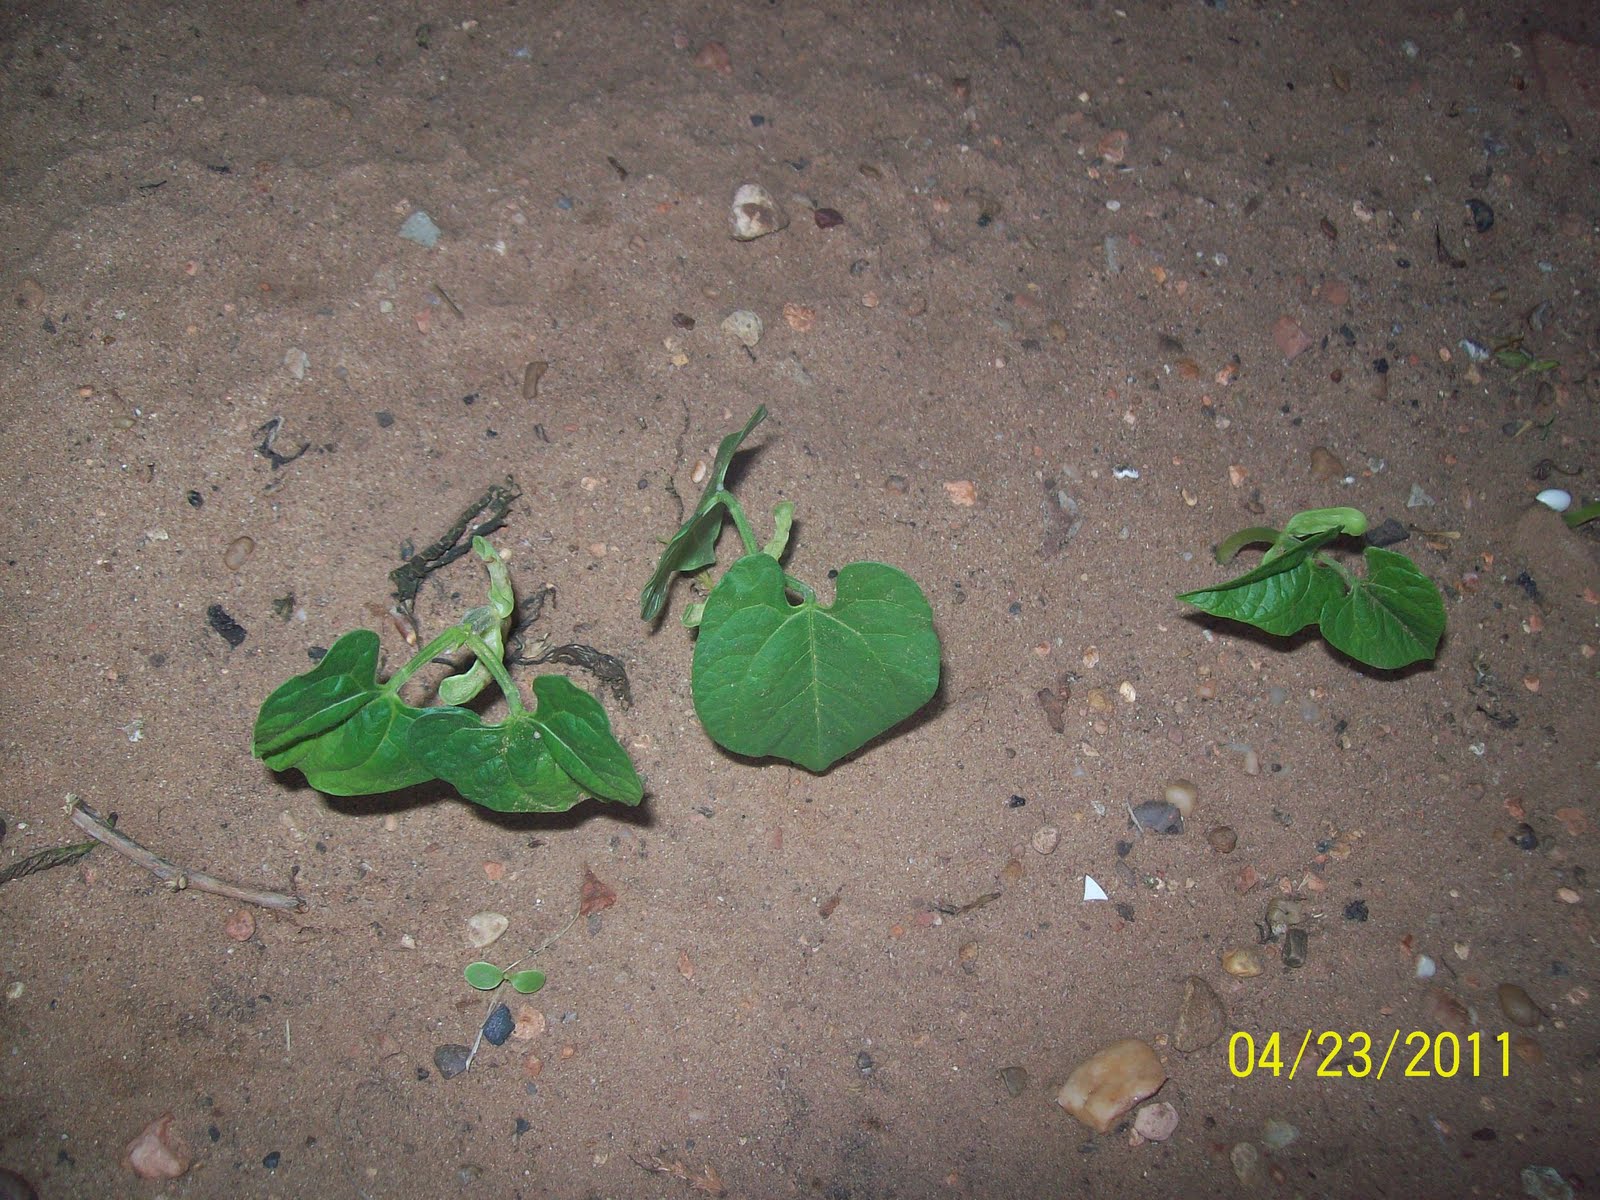
Green Beans ....aren't they sweet?
Corn and green beans....theory is that pole beans will grow up corn stalks??? I am such a novice...I just do what I am told!
Baby Okra! Now my Carrots didn't come up...and this has happened another year...Don't know what it is about carrots....does anyone have any idea???
Tomato Plant in a bucket! All nice and protected!
All my buckets...with a plant in each one. Tomatoes and Bell Peppers and one Sweet Banana plant....I'm so proud!
Now this is Tool Man's experiment tubs...he took the extra seed that we had and put them in these syrup tubs (you have cows like we do....you have lots of syrup tubs). He got dirt....really good cow dirt aka cow poop...from the calf lot and used it pure. Not sure if this is too "hot" but we will see!
Hope you enjoyed the pics!
God Bless,
Mama D
My Corn and Squash!!! Daddy planted the squash with the corn??? Said they could grown in the same row....I just think I am gonna have a lot of squash!
Green Beans ....aren't they sweet?
Corn and green beans....theory is that pole beans will grow up corn stalks??? I am such a novice...I just do what I am told!
Baby Okra! Now my Carrots didn't come up...and this has happened another year...Don't know what it is about carrots....does anyone have any idea???
Tomato Plant in a bucket! All nice and protected!
All my buckets...with a plant in each one. Tomatoes and Bell Peppers and one Sweet Banana plant....I'm so proud!
Now this is Tool Man's experiment tubs...he took the extra seed that we had and put them in these syrup tubs (you have cows like we do....you have lots of syrup tubs). He got dirt....really good cow dirt aka cow poop...from the calf lot and used it pure. Not sure if this is too "hot" but we will see!
Hope you enjoyed the pics!
God Bless,
Mama D
Subscribe to:
Posts (Atom)