Saturday, July 23, 2011

Chicken Coop!

Well my wonderful Tool Man has also been busy this summer! One of the things that we had to do was build a chicken coop for my flock of chickens. We started out with 25 chicks and have 18 hens and one rooster left. Unfortunately a hungry Mama Cat found a way to get in our holding pen and had herself a little feast with 6 of my chickens! So the plans to move the chickens became a priority!

My hubby had already begun cleaning an area on one of the buildings around our house....luckily it already had a good roof and back wall! All he had to do was create side walls and front wall and door of course!
Lucky for us my granddaddy doesn't believe in throwing anything away...and he was able to use the sides of and old cotton trailer to build the remaining sides of the coop. Between the Tool Man and my Daddy I had a chicken coop in a couple of days! It amazed me what they accomplished with scrap tin sheets, wire to repair the chicken wire on the sides of the trailer and some old wood! I think the only thing they bought were the hinges and handle for the door!

My hard working Tool Man!!! And an inside view of the back wall of the coop!

After research and much advice to give my girls a perch up off the ground! So the Tool man put together this perch for me! The top and bottom is reinforce with a piece of sucker rod...and the rest is just 1"X6" boards and     1 1/2" dowel rods. He suspended this from the ceiling with heavy grade wire then secured it the the back wall with screws so that it wouldn't sway as the chickens got up and down!

The Tool Man also rigged this gravity feeder for me! When the chickens were little we had the traditional feeders...little tray with the holes in it...but they were always filling it up with their bedding and covering up their feed...and considering the floor of this coop is sand...I didn't want that! So Tool Man took a 5 gallon bucket (that he got for free!) and cut a hole in the bottom of it...suspend it from the ceiling over a tray...and now I have a feeder that I only have to fill up about every two weeks! The 5 gallon bucket holds about a 25 lb. bag of feed! Tool Man set it up on an old tire to try to keep the sand outta the feed. And this works really well. All I have to do is move the bucket forward to fill the tray everyday! That makes it so much easier on this pregnant woman!

Now there is nothing special about my waterer...other than the fact that I LOVE it and my Daddy got it for me! I tried to use the 1 gallon waterers. I had two of them and my poor chickens kept running out of water...I was going out there twice a day to keep them going! And with over 100 degree heat daily...water is very important for them! Besides all that the waterers that I had were the type that you filled from the bottom...which means I was taking them off the hooks, taking them outside the coop filling them up, carrying them back into the coop and rehanging them...sigh...cumbersome prego, with bad balance, uneven ground and heavy waterers...not a good combo. So with a plea to my Daddy (who helps take care of the chickens...it's a joint venture!) He went an bought me this wonderful 3 gallon waterer! The lid lifts right off and all I have to do is stick a water hose down in there and fill it up! Now I do rinse out the bottom of the tray daily...but it is still super easy! And my Tool Man even ran a hose inside the coop with a cut off valve on it so I didn't have to walk over the uneven ground to get to the faucet!

This is our latest addition! Nesting boxes! My Daddy already had these...all they needed was a little repair work and we were ready to go! I got the pleasure of helping Tool Man hang it on the wall of the coop this afternoon! We had some leftover bedding from when they were little it is ready for the eggs! Just hoping some of my girls decide to start laying soon!

All in all I have a good looking flock of chickens! By the way red buckets were put in so that the chickens didn't have a far to jump to the ground from the perch....was advised that it might crack their eggs...would rather be safe than sorry! And thanks to my Tool Man and my Daddy...taking care of them is easy! I am just ready for some eggs....bring on the fresh eggs please!

God Bless,
Mama D

Friday, July 22, 2011

I'm Still Here!

Well Folks...it's been a while since I last posted! I am sorry...life simply got in the way! Down here in Texas we have been having record break heat on a daily basis...very few days have we seen without going over the century mark. And we are also suffering with a drought! We actually got just a little rain about 10 days ago...and were very grateful. They cut our hay last night and we got a little over a bale an acre...which was excellent considering the weather conditions.

I am so sorry folks....being Texan and part of a cattle operation...the weather conditions are rather important...and not just an inconvenience in our household! I'll quit rambling now.

As most of you know I am pregnant! We found out the first part of June that it is a little boy and we have named him Elijah! I have been busy at the sewing machine trying to get ready for his arrival!
This is my first set of cloth diapers...tutorial to come soon. I made 24 to get us started! And intend to make that many more in the next size up, for later on. These are supposed to go up to 20 pounds. I had fun collecting my supplies at various garage sales and Goodwill! These were all made out of used receiving blankets, tee shirts and old cloth diapers! And to save money and keep the versatile I left off the speciality Velcro and snaps that are recommended...and will be using old fashioned diaper pins and vinyl covers.

I also convinced my darling Tool Man to set up his crib a little early so that I could have fun nesting and decorating! I was inspired to make some kind of wall decoration for my son....but I didn't want anything that cost money or could be pulled down and hurt him when he gets to that stage in life!

The letters of his name were made from scrap material leftover from projects of days gone by. And the cross stitch piece was made by yours truly several years ago...simply because I loved the pattern....never did give it away like I normally do my projects....now I know why I saved it!

I have also had time to make Bear a new tee shirt dress since Easter. However I did learn a very important lesson! Dresses with very full skirts on little girls inspire twirling....which is really cute...however it can get rather embarrassing when said girl does it during church services...in front of the entire congregation! So when I made the new dress it wasn't quite as twirly!
But still fun to wear!

I also had time to make a little something for me too! I have enjoyed this pregnancy more than I thought I would....being over 100 pounds lighter makes a HUGE difference! And when I started showing I wanted a "Baby Bump" shirt...but me being me didn't want to pay for one...and since Baby is due in October I fell in love with the ones that say "Momma's Lil' Pumkin' Coming Soon!"

I used a technique called reverse applique...and thought my "Lil' Pumpkin" Shirt turned out rather cute! I had so much fun with the reverse applique technique that I have my teen age sister gathering up her plain tees to make cool new shirts for school! Also have several plans for Bear as well. And with school starting a month from today...I need to get busy!

Have you noticed yet the lack of cooking mentioned??? Well refer to my first paragraph as to how hot it is outside! I have been doing as little as possible in the kitchen the last couple of months! I generally hit it in spurts! And do as much as possible during that time! Considering the fact that my feet and legs are now swelling due to my pregnancy ... this will probably become the norm for a while! I am hoping to get my freezer well stock with freezer meals for the month of October and November! That way neither Tool Man or I have much to do kitchen wise!

Oh and we also had several birthdays at the beginning of this month! I had more fun making cakes!! I think I ended up making three in one week and a double batch of fried pies! I will have a post on the homemade fried pies, too!


Well the top picture is my version of an Over The Hill cake! We had three cousins at our family reunion...all born a month apart...all turning 40 this year! With a little help from my Tool Man and the Dollar Store this was an easy cake to decorate! The second is of course my Bear's 7th birthday cake! I realized that I had made all my girls a Barbie Doll cake at some point through out the years...and since Bear is into Barbie....it seemed like a good choice! She sure did love it! By the way the dolls arms are in the air because she held a banner that said Happy Birthday! My teenager also celebrated her Sweet 16 this year...but she is not into the decorated cakes. Why? When she can pick some kind of decadent dessert! So she got Homemade Hot Fudge Cake! Which I failed to get a picture of except with my phone!

Add a weeks worth of crafts at VBS and two 16 hour car trips to all of that and it has been a busy summer! Right now, except for getting ready for school, it has calmed down a bit, so I will have a little more time to get my thoughts together and get all these post written that I have picture for! You will be hearing from me again really soon!
God Bless,
Mama D

Tuesday, May 24, 2011

Twice Baked Potatoes

Twice Baked Potatoes are one of my families "special" treats! However they can be a really cool freezer side dish or meal! I particularly like this recipe because it can be prepared ahead of time for as many or a few as you need. And IF you have extras they can be wrapped, frozen and reheated for a later meal!

Now this is one of those recipe that I watched a cooking show on how to make our favorite comfort foods healthier but still taste the same! And this is actually one of those recipes that can be altered in that manner and they still taste great!!! I have long since altered the recipe to suit my families taste and budget....so it is similar to the original...but has some of the good stuff added back in!

Twice Baked Potatoes

Now I normally use the 'regular' sized potatoes for this dish because we eat them as a side...however if you are using it as a meal use the larger bakers or plan on cutting the larger potatoes in half and counting as two portions!

You will need:
Jelly Roll pan or Cookie Sheet
# of potatoes (1 per person)

Thoroughly wash and scrub all potatoes. Dry with a paper towel. Puncture potatoes with a fork or knife a couple of times and bake uncovered in a 350 or 400 degree oven until soft. You want them uncovered so that the skins get a little on the crispy side! I have also rubbed mine with oil and kosher salt for added flavor.

Remove from oven and allow to cool until you can easily handle without burning yourself.

For smaller potatoes slice the top of the potato off...discard top...for larger potatoes cut in half lengthwise.


Scoop out insides, leaving enough around the edges for the shells to hold their shape. Place insides in a separate bowl.


Place shells back onto baking sheet. I normally line mine with foil and spray with oil to make the clean up process faster. And it's okay if they are a little crowded...won't hurt them a bit!
Now to deal with the insides!
This is where I am gonna tell you what I put in and any variations that I have used in the past.....but you put what YOU and your family like into the pot....this recipe is really about the process not the ingredients.

The first thing I do is add plenty of salt and pepper! This dish can be totally ruined if you don't season properly! Bland is not a good thing here! You want a really good combination of flavors!

Now this recipe was made for about 15 people...so I have some big amounts of the following ingredients....if you are only making for a family of 4...adjust accordingly!

1/2 cup butter, melted
1 cup buttermilk (and this can actually replace your butter altogether...for a more low fat version...omit the butter)
1 cup sour cream (I was out when I made this so I used plain yogurt and not one person....especially my overly "I don't eat yogurt!" Daddy couldn't tell the difference...snicker snicker!)
1 cup of grated cheese (flavor of your choice here....sharp cheddar makes a really good addition...but all I had was mild cheddar)
3 or 4 slices of crisp bacon, crumbled (adjust this to taste as well! I have also been know to use turkey bacon (again Daddy never knew) or those soft bacon bits when I forgot to make my bacon ahead of time)

Mix all these ingredients with the potato insides. It should be kinda goopey! You don't want it too dry (just add a little extra buttermilk or sour cream) or to soupy.....it need to hold it shape. To avoid it being to goopey/soupy I add the buttermilk a little at a time toward the end of my mixing.


Stuff each shell with your not so goopey potato mixture....now with all the added ingredients you are gonna have plenty of filling....I normally end up with extra...so don't be afraid to heap it up!!!!

Okay....at this point you can do one of several things.

1. You can wrap these in plastic wrap separately, place in Ziploc freezer bag...and freeze. When you get ready to serve them, merely take out the desired number of potatoes, thaw, top with grated cheese and bake at 350 degrees for 25 to 30 minutes.

2. Cover with plastic wrap or foil and refrigerate over night. Set out on counter about 30 minutes before topping with grated cheese and baking at 350 degrees for 25 to 30 minutes.

3. Immediately top with grated cheese and bake in a 350 degree over for 25 to 30 minutes while snacking on your left over filling and beating the kids off with a wooden spoon!

Regardless of the option you choose....

This is what it should look like when all baked and yummy! And don't forget IF you have leftovers...wrap well...freeze...thaw and reheat in the microwave!
I made these for Mother's Day....and as I was determined to do as little cooking as possible that day I made mine on Saturday and all I had to do Sunday was let them come to room temp. and bake!!!

Praying that you have a blessed week!
Mama D

Baked Bacon

Baking Your Bacon

Now I have a short story to tell you....I used to work at a local convenience store that had a small deli counter/burrito counter attached to it! The burrito counter specialized in homemade tortilla, breakfast and lunch burritos! I worked on the other side making sandwiches, slicing deli meat and cheeses and making hamburgers, BUT when the burrito side needed help....I normally got to do the grunge work! Now the burrito side was staff by a very cool group of Hispanic ladies! All but one of them was shorter than I am and every single one of them could run circles around me working!

What they didn't know was that while the were running circles around me and having me do grunt work....I was watching and learning! Now their breakfast burritos are the best that money can buy in this area! The combination includes bacon, sausage, ham, eggs, fried potatoes, homemade pico de gallo and homemade hot sauce! All of which I either prepped for cooking or cooked for serving at one time or another!

One of the things that I remember the most...that I had never seen before was that they BAKED their bacon!?! And I thought that was the coolest thing that I had ever seen! I mean ...yeah it splatters all over your oven...but I would rather have nice evenly cooked bacon that I didn't have to stand over and get burnt by and clean my oven than the alternative!!! And it saves so much time!! You can have your bacon cooking while you make your other items on the menu!

So here is what I learned...
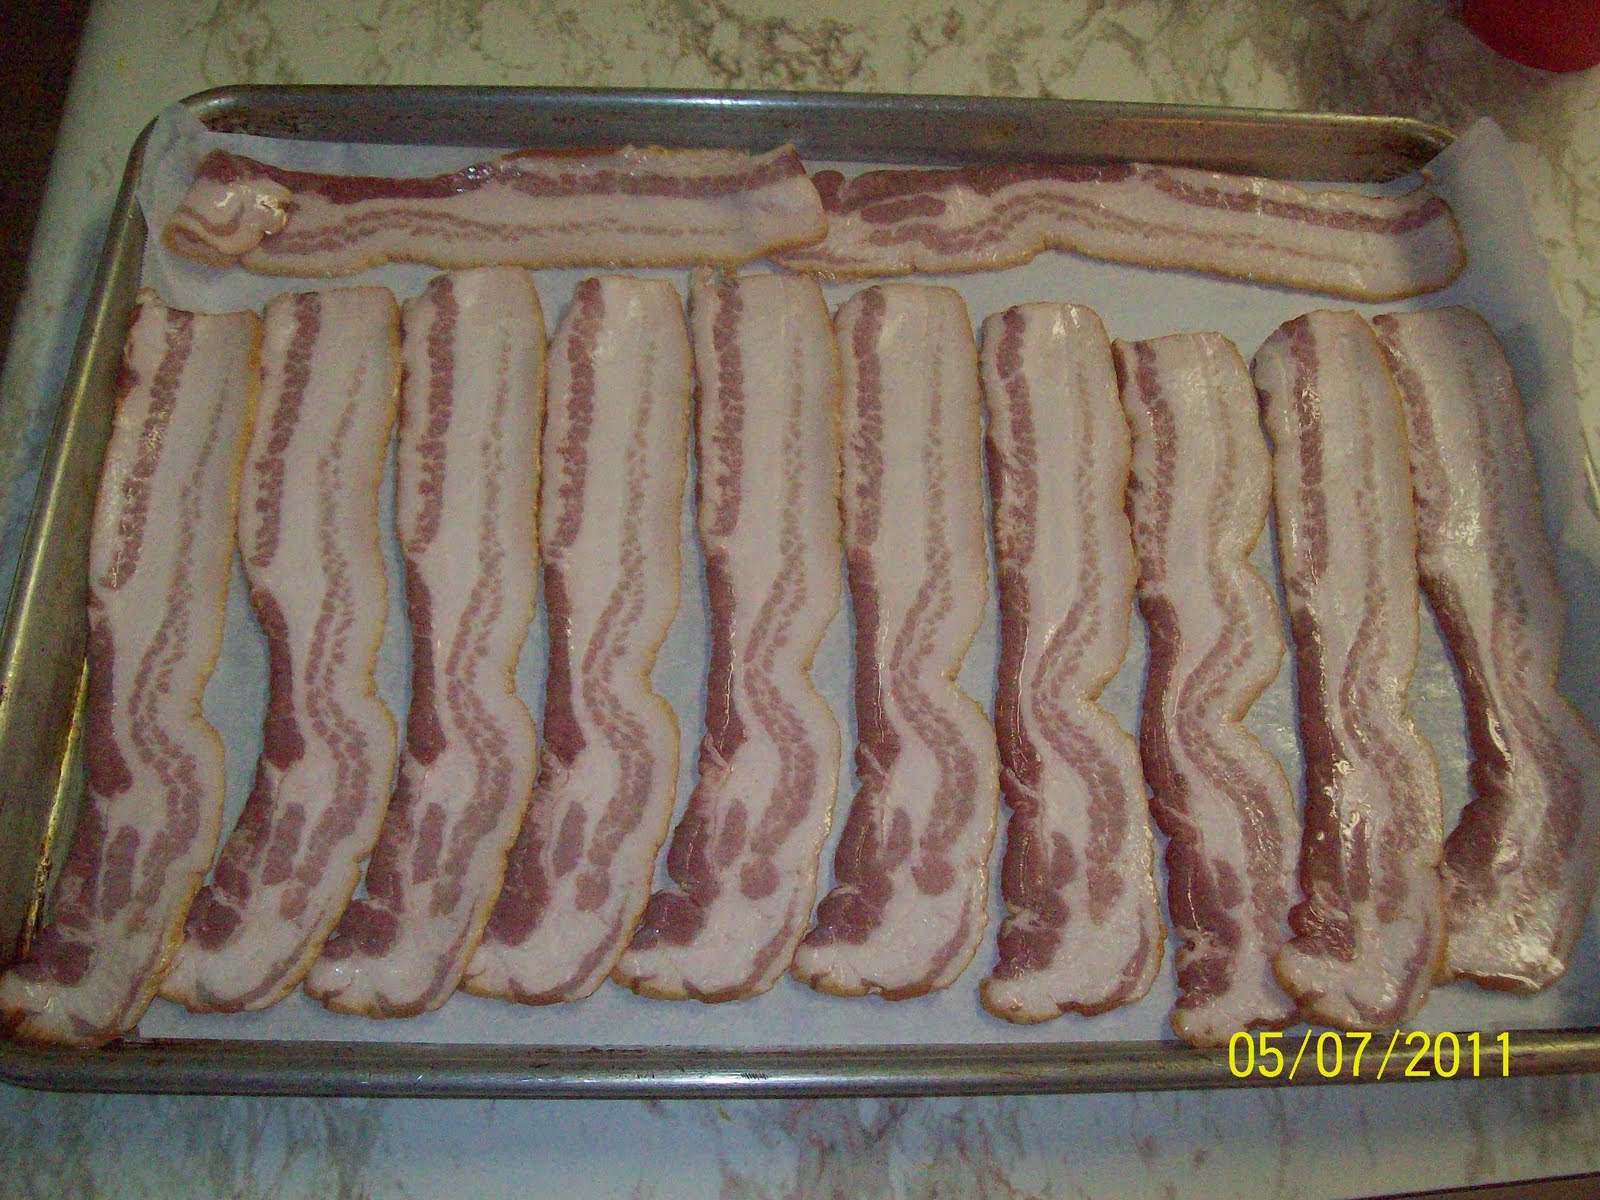
Line one jellyroll pan with parchment paper OR place one cooling rack on a jelly roll pan (I don't like cleaning the cooling rack afterwards, so I normally go with the parchment paper method).

Lay out one pound of bacon. (and it really doesn't matter if the bacon is touching or slightly over lapping...it's gonna shrink as it cooks)

Place in a pre-heated 350 degree oven for appox. 20-25 minutes! The amount of time depends on how you like your bacon!

We like ours full cooked...and a little on the soft side! I suggest you set your timer for about 15 minutes and check every couple of minutes until it reaches your preference!

Now remove from your pan and let drain on paper towels like normal!
I allow the grease to cool for a few minutes before pouring into my storage container for seasoning later! (yes I am an old fashioned cook that still uses bacon drippings as seasoning!)

Hope you have a great rest of the week!
God Bless,
Mama D

Wednesday, May 11, 2011

Deveiled Eggs

Devieled Eggs

Well considering I did my fair share of the cooking for Mother's Day...and I did some family faves. I thought I would share with you my recipe for devieled eggs. This is one of my husbands favorite treats when we have family meals. And I have to tell you this story....

When Tool Man and I were first married and having one of our first family get togethers...I was asked to make Deveiled Eggs. I of course did what I had always done when making deveiled eggs...when I got my yolk mixture made I took a small bite of it to the man of the house (I was used to this being my Daddy) to taste. Now my Daddy would have tasted the mixture and told me if I need to add anything to it before filling the egg white shells...salt, pepper, vinegar...I had made my mixture the way I had been taught. But that is NOT what my new husband did! He wanted me to fill an egg shell with a big ol' heaping spoonful of yolk...so that he could really see what they tasted like....then he proceeded to tell me they didn't taste right! He said and I quote, "They don't taste like Mom's." OK at this point most newly married wives would have broke down in tears...not me! I picked up the phone, called his Mother, told her what he had done and said (which she was appalled at!), once I got her to quit apologizing I asked her how she made her deveiled eggs so that I could adjust my recipe to make my new hubby happy! Come to find out it was really simple...she put a little sweet relish in hers and I had always used vinegar or dill pickle juice in mine.
So here is our version (a combination of mine and my sweet Momma-In-Laws) recipe for deveiled eggs!
Devieled Eggs

I made this recipe to feed 13 people. When I made these I always try to make an egg per person with a couple of extras just in case. I always have that one egg that won't peel pretty or splits down the middle...or that snitch that comes and wolfs down two or three before I even get them finished. I believe I ended up making 18 eggs for this batch.

Begin by boiling your eggs in salted water. The method I use for boiling eggs is pretty simple . I place all my eggs in a pan...size depends on how many eggs you are making...cover completely with water. Add 2 or 3 good pinches of salt. And turn on my on burner on medium to medium high heat. When water begins to boil I set my timer for 10 minutes. When timer goes off I turn the heat off on the stove. Now if I have the time I let them cool in the pan, drain the water and refrigerate over night. (They peel easier cold) But if I don't have time I drain the hot water and run cold water over until the eggs are cool enough to handle.

Then peel all of your eggs...rinse with cool water to remove any excess shells.
Cut each egg in half lengthwise and remove yolk. Place all your yolks in a bowl and place egg whites on your tray, plate....whatever you are using!

I use a fork to mash all of my yolks together, they should be very small crumbles! I then add a good layer of salt and pepper (appox. 1 tsp each). And mix!

I then add a heaping tablespoon of yellow mustard, a heaping tablespoon of Miracle Whip (or mayo...use what you prefer) and a tablespoon of sweet relish. I really don't measure this....you kind have to eyeball it...it all really depends on how much you are making....use less if you are making few eggs and vice versa!

Mix this well with a spoon or fork. It should have a paste like consistency. If it is too dry add a little more mustard or mayo, if you are still having issues add about a teaspoon of vinegar or the juice off of some dill pickles.
At this point I normally have someone taste test my mixture....adjust to your own preferences, just be careful not to let it get too dry or too runny!

Now because this was for Mother's Day and I wanted it to look nice...I used a pastry bag and tip to fill my eggs.


I am trying to show you in this pic to use a tip with a large opening! If not you will spend more time fighting the clumps of egg that didn't get completely mashed...than you will filling your whites! (personal experience and over 100 eggs to fill! I know what I am talking about!) You can use a Ziploc bag and tip or just a spoon to fill the whites...it's your choice and what you are comfortable with!

To finish sprinkle your eggs with Paprika! Or garnish of choice! I have always used paprika...but I have to leave a few eggs plain for my Grandma!

Enjoy! God Bless,
Mama D

Vanilla Update...and Smaller Recipe

Vanilla Update!

Well three months ago I made my first batch of homemade vanilla! I had been seeing recipes on the various blogs I follow for nearly a year....and I finally had the resources to start my first batch!
See I marked my kitchen calendar every month...so that I wouldn't forget to shake to jar (this was in my original instructions). However I have about decided that I need to put this notation on my desk calendar instead....I tend to look at that one daily...because I was busy outside all day I didn't get to it until today. I also need to put thing like when to water my plants down on that calendar! My Momma has this master list of things that she does on a monthly basis and beyond....I really need to start paying attention to stuff like that!

My jar of vanilla after three months! As you can see I have been marking off the months on my label when I go shake/check on my jar! That was one of my more brilliant ideas!

Now....for the new recipe! One of the rather daunting things for me about making this vanilla was finding vanilla beans that I could afford, that were good quality and would make the amount of vanilla that was required in my recipe....my recipe calls for 3/4 of a pound of beans! And when you go shopping the recommended beans are quite expensive! Another issue that I thought of...the normal person that cooks is not going to be able to use a GALLON of vanilla very quickly! I mean seriously....even me, a person that makes most things from scratch and cooks on a daily basis doesn't use that much vanilla in a year. The only reason I was willing to make this much was because I know I will be using it for Christmas gifts!

BUT I was reading the Ma/June 2011 issue of Cooking with Paula Deen...and looky what I found!

The same recipe cut down to just a cup of vodka and 2 or 3 vanilla beans!!! Woo Hoo...I was excited! It just never occurred to me to cut the recipe down to a more workable size! And that other up side...you can buy 2 or 3 of the REALLY good vanilla beans for a WHOLE lot less than you can buy 50 or so that the big recipe calls for!

The only real difference that I saw in Paula's recipe was that mine recommend the vanilla stay in a cool dark place for 6 months....hers says 2! Basically everyone says something different....and the truth of the matter is...the longer the beans stay in the vodka...the better and stronger your vanilla is gonna be! And even with this recipe you would have enough to share with a friend!!! So if you weren't to keen on the whole gallon of vanilla thing and just want to experiment before you commit yourself... try the following recipe!!!

Homemade Vanilla Extract
1 cup vodka (remember it can be the cheap stuff)
2 to 3 vanilla beans, split lengthwise (leave about 1/2" at top so bean stays together)

In a clean glass bottle or jar with a tight-fitting lid, combine vodka and vanilla beans. Seal and place in a cool dark place for at least 2 months before use.
Credit-May/June 2011 issue Cooking with Paula Deen

MMmmm...I am wondering if there are other extracts you can make homemade...gonna have to do some research! Anyone have any recipes???

God Bless,
Mama D

Monday, May 9, 2011

Mother's Day and A Day Working Cows!

Well Happy Mother's Day to all my fellow Mama's out there! I must say I had a great one!!! I spent most of the day Saturday cooking so that I could spend Sunday visiting and enjoying the day! My sweet hubby and baby Bear let me sleep in while they ran to Wal-Mart to pick out gifts and run by my favorite donut shop for breakfast! I then loaded up my van with all the goodies I had made on Saturday and headed to MY Momma's house to visit with her, my Grandma, Aunt Flossie, Uncle Monroe, Uncle David and cousin Billy Jack! We had lots to be thankful for and lots of people to fellowship with! It sure did help that Momma and I learned a long time ago to share the cooking responsibilities when we have lots of family in like that!

I even managed to wake up to an entirely clean kitchen on Mother's Day(I am not real good about keeping up with my dishes....I tend to clean Before I cook instead of After!), so waking up to all my dishes clean and them staying clean all day was really a treat for me! And I have some really cool pics...but I left my camera over at my Momma's house! I also took pics of all the cool things that I cooked on Saturday so that I could share them with you this week....and guess where all the pics are!?! So I will get my camera from my Momma in the morning and hopefully have some cool cooking posts to share with you the remaining of the week!

Today I had a entirely new experience.... I would describe myself as a girly country girl to most folks! I grew up with the mentality that when the menfolk were out working, I was to provide cold drinks and good hot food when they decided to come in the house...and otherwise keep myself in the house and out of earshot and harms way! Well things have changed around here and it is not like that anymore. I personally know one very amazing woman (whom I had the pleasure of working with today) that can work side by side with her husband and is not afraid of hard work. My own husband is slowly but surely encouraging me to be an active part of our family farm operation. Today I got to see first hand what all goes on vaccinating the cows and calves, as well as changing the bulls to steers!
This is one of our calves that got a little confused... I don't think he knew which way was up by this point!

I of course being 4 months pregnant was well protected while my husband, Daddy, and the couple that was kind enough to come and help us did all the hard work! I was given the task of keeping the paperwork from under a shade tree on a chair with a bottle of water! And my hubby and Daddy making sure I was okay ever so often! Everyone else did the hard work, while I sat on my tush! And then since it was supposed to hit over 100 degrees today I got sent in the house after about 4 hours! I also made it my job to make sure everyone stayed well hydrated! My guys tend to forget that little fact while out in the heat and then pay for it later...so whenever we had a break I put a bottle of water or Gatorade in their hands and made sure they drank!

When I got ran in the house I proceeded to set out lunch for everyone....sandwiches on homemade bread with all the fixing's! But I did find the whole process interesting! We (I say that very loosely) vaccinated all the cows, sprayed something in their ears and poured something on their backs! And that was the easy part! Then came the calves! Those had all that done to them, plus ear tags, and for all those little boys....well they got their minds changed for them....in the most humane way we possibly could! I am kinda glad I was pregnant for this round and just had to watch! It was hot, sometimes scary, sometimes frustrating work....and I had the easy job! And to think we have to repeat everything here in a couple of weeks!

And the adventures at our little farm just keep getting more interesting! I sadly lost six of my chickens this weekend due to a very well fed cat! Luckily we figured out what was happening before it got out of hand! And have now "fixed" the problem!

Hoping and praying everyone has a wonderful and blessed week!
God Bless,
Mama D