Today was a red letter day for my hometown! We were proud to host the First Lady of Texas Anita Perry! She was here to welcome us into the Texas Main Street Program. Something for which our town has been striving!
I was honored to play a small role in welcoming out First lady. I was asked to provide a tray of food for the reception held in Mrs. Perry's honor. After much deliberation and advice from family I decided on a tray of mini muffins. A smaller version of what I normally sell. I made Mini Banana Nut Muffins, Strawberry Nut Muffins and Mini Rolls.
After arranging and rearranging my tray and labeling everything I failed to take a photo....but I am sure that my friends here in our little town will let me know how it all worked out! I also intended on attending the ceremony, but this being Texas...the wind decided to blow all day! And my allergies being what they are ...even stepping outside to water my garden and feed and water the chickens gave me a terrible headache! So I decided that it would be best if baby bump and I just stayed home! I am looking forward to reading a full report in our Sunday's newspaper though!
Linky to Story
Above is a link to the story! Hope you enjoy!
God Bless,
Mama D
Friday, April 29, 2011
Saturday, April 23, 2011
Updated Garden Pics
Well I have been super excited this week because my garden is just sprouting away!!! I got out tonight and took some more pics because I am so proud! Also my Daddy bought me some tomato and pepper plants to replace those that I lost last week due to my lack of knowledge and the wind/sand storm we had! We took extra care and placed 5 gallon buckets with the bottom cut out around each little plant! Looks kinda funny but both my Daddy and Daddy In Law say that it will do the trick!
 My Corn and Squash!!! Daddy planted the squash with the corn??? Said they could grown in the same row....I just think I am gonna have a lot of squash!
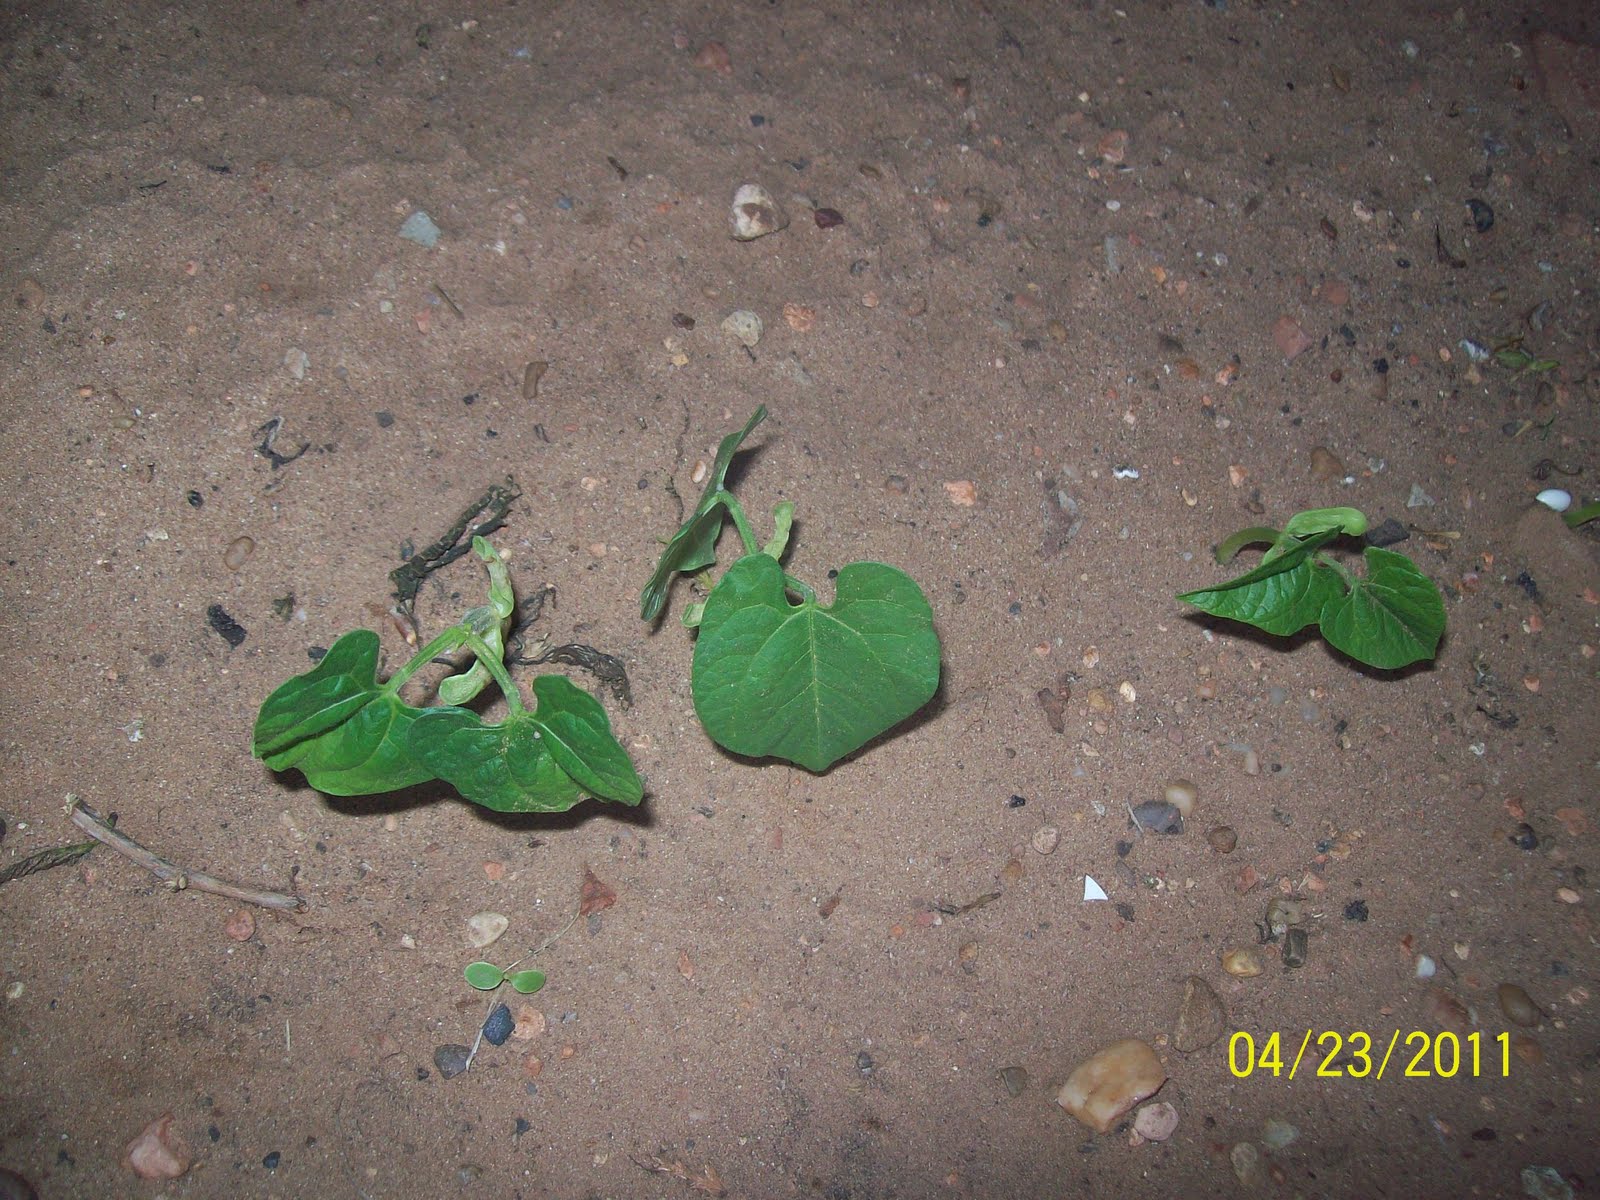
 Green Beans ....aren't they sweet?
 Corn and green beans....theory is that pole beans will grow up corn stalks??? I am such a novice...I just do what I am told!
 Baby Okra! Now my Carrots didn't come up...and this has happened another year...Don't know what it is about carrots....does anyone have any idea???
 Tomato Plant in a bucket! All nice and protected!
 All my buckets...with a plant in each one. Tomatoes and Bell Peppers and one Sweet Banana plant....I'm so proud!
 Now this is Tool Man's experiment tubs...he took the extra seed that we had and put them in these syrup tubs (you have cows like we do....you have lots of syrup tubs). He got dirt....really good cow dirt aka cow poop...from the calf lot and used it pure. Not sure if this is too "hot" but we will see!
Hope you enjoyed the pics!
God Bless,
Mama D


Hope you enjoyed the pics!
God Bless,
Mama D
Lemony Deliouciousness!
Lemon Delight!
As it is Easter weekend and time for family celebrations I have decided to share my super easy Lemon Delight recipe.
In my family everyone has a favorite dessert, Grandma likes cobblers, Daddy likes pies, Momma likes Chocolate cake, cookie bars or just plain ol' My Man Cookies, the teenager likes anything chocolate...and the list just goes on! I was asked to make the bread and dessert for today's lunch. And considering I am pregnant and have weird cravings I decided to indulge myself instead accommodating everyone else! I wanted something light, lemony and delicious!
So out came the recipe for my Grandma Edna's Lemon Delight! Now let me tell you, with just a little forethought this can be turned into an almost sugar free recipe....so dieters don't give up on me...this is one that you can make!!! You can also change the Lemon part to chocolate, butterscotch, pistachio.....whatever flavor of pudding you like!
Now here's what you do!
First start with a package of grahman crackers....I happened to have the kind with cinnamon on the tops of them but you can use plain or the kind that is already crushed in the box. (you'll need between 1 1/2 to 2 cups) I broke all of my crackers up and placed them in my food processor with about 2 tablespoons of sugar. Pulse until merely crumbs then add 1/4 cup of melted butter or margarine. Pulse to blend. Press into the bottom of a 9 X 13 casserole dish and bake for 10 minutes at 350 degrees.
Note*** Now ladies if you don't have a food processor and your a needing to work off a little frustration....just put those crackers in a Ziploc bag a go to beating the crap out of them....and as an added bonus you'll burn some extra calories...if it's your hubby your frustrated with take the roll pin to the bag...it seriously helps! My men folk know not to mess with me when I start banging stuff on the counter tops....I am generally miffed at one of them!
 This is what it should look like after being baked and cooled completely!
Now you want to start on your next layer....while the crust is being baked and cooled set out one or two 8 oz. packages of cream cheese to soften. Now as high as cream cheese is right now ($1.99 at the local grocery store) you might want to catch this on sale and have it stocked in the freezer! When crust is cooled....place cream cheese in bowl with 1/2 to 1 cup of powdered sugar (depending on weather you use 1 or 2 pkgs. of cream cheese) and a small container of whipped topping. Now I use two packages of cream cheese, 1 cup of powdered sugar and the whole container of whipped topping...but I like that layer a lot and had all the ingredients....however you can half all that and come out just fine!
Note*** This is one of those variations times...you can use reduced fat cream cheese and fat free sugar free whats the point in eating it whipped topping and you could use splenda instead of powdered sugar....but really folks if you are making dessert....MAKE DESSERT!
Also you can stop here and top it with a can of Cherry Pie filling and call it an Easy Cheesecake....but be sure to double everything like I did or your cheesecake layer will be kinda skimpy!!!
 Spread Cream Cheese mixture over your crust...try to get a smooth as possible for the next yummy layer!
Next you need two small packages or one large package of your favorite pudding! Yes you can use sugar free and skim milk! I used what was in my pantry! I personally can't tell the difference in sugar free pudding and regular....so I generally buy the sugar free variety! Mix your pudding according to the PIE directions and pour this over your cream cheese layer!
Note***to save washing another bowl I used the same bowl I mixed the cream cheese up in .....beaters and all...because I don't like doing dishes and don't mind those little bits of cream cheese floating in my pudding....but you do what you want!
 At this point I put plastic wrap over it and placed it in the fridge for the pudding to set. I left it in there overnight and didn't put the final topping on till right before serving. This normally the best way to transport this dessert...because the pudding won't stick to the plastic wrap the way whipped topping does!
However if you are serving it at home....or soon after making you merely need to let the pudding set and top with whipped topping (a whole small container) before cutting into squares and serving!
 My Momma took this picture of her piece before happily devouring it at lunch today! Then she found the spoon that I spread the whipped topping with and enjoyed that too....but was "too old" to just lick the spoon! Snicker Snicker! Makes me want to go dig into the extras....but I told myself there was enough left that we could have it for dessert tomorrow too! And that would save me from making Buttermilk pies!
My Easter Menu this year is....Ham (cooked in the crock pot with a apple juice and brown sugar glaze), Candied Yams, Green Beans or Broccoli and Cheese?? and Homemade Rolls! With my lovely left over Lemon Delight for dessert! What are you making or eating....whatever the case may be???
God Bless and Happy Easter!
Mama D
As it is Easter weekend and time for family celebrations I have decided to share my super easy Lemon Delight recipe.
In my family everyone has a favorite dessert, Grandma likes cobblers, Daddy likes pies, Momma likes Chocolate cake, cookie bars or just plain ol' My Man Cookies, the teenager likes anything chocolate...and the list just goes on! I was asked to make the bread and dessert for today's lunch. And considering I am pregnant and have weird cravings I decided to indulge myself instead accommodating everyone else! I wanted something light, lemony and delicious!
So out came the recipe for my Grandma Edna's Lemon Delight! Now let me tell you, with just a little forethought this can be turned into an almost sugar free recipe....so dieters don't give up on me...this is one that you can make!!! You can also change the Lemon part to chocolate, butterscotch, pistachio.....whatever flavor of pudding you like!
Now here's what you do!
First start with a package of grahman crackers....I happened to have the kind with cinnamon on the tops of them but you can use plain or the kind that is already crushed in the box. (you'll need between 1 1/2 to 2 cups) I broke all of my crackers up and placed them in my food processor with about 2 tablespoons of sugar. Pulse until merely crumbs then add 1/4 cup of melted butter or margarine. Pulse to blend. Press into the bottom of a 9 X 13 casserole dish and bake for 10 minutes at 350 degrees.
Note*** Now ladies if you don't have a food processor and your a needing to work off a little frustration....just put those crackers in a Ziploc bag a go to beating the crap out of them....and as an added bonus you'll burn some extra calories...if it's your hubby your frustrated with take the roll pin to the bag...it seriously helps! My men folk know not to mess with me when I start banging stuff on the counter tops....I am generally miffed at one of them!

Now you want to start on your next layer....while the crust is being baked and cooled set out one or two 8 oz. packages of cream cheese to soften. Now as high as cream cheese is right now ($1.99 at the local grocery store) you might want to catch this on sale and have it stocked in the freezer! When crust is cooled....place cream cheese in bowl with 1/2 to 1 cup of powdered sugar (depending on weather you use 1 or 2 pkgs. of cream cheese) and a small container of whipped topping. Now I use two packages of cream cheese, 1 cup of powdered sugar and the whole container of whipped topping...but I like that layer a lot and had all the ingredients....however you can half all that and come out just fine!
Note*** This is one of those variations times...you can use reduced fat cream cheese and fat free sugar free whats the point in eating it whipped topping and you could use splenda instead of powdered sugar....but really folks if you are making dessert....MAKE DESSERT!
Also you can stop here and top it with a can of Cherry Pie filling and call it an Easy Cheesecake....but be sure to double everything like I did or your cheesecake layer will be kinda skimpy!!!

Next you need two small packages or one large package of your favorite pudding! Yes you can use sugar free and skim milk! I used what was in my pantry! I personally can't tell the difference in sugar free pudding and regular....so I generally buy the sugar free variety! Mix your pudding according to the PIE directions and pour this over your cream cheese layer!
Note***to save washing another bowl I used the same bowl I mixed the cream cheese up in .....beaters and all...because I don't like doing dishes and don't mind those little bits of cream cheese floating in my pudding....but you do what you want!

However if you are serving it at home....or soon after making you merely need to let the pudding set and top with whipped topping (a whole small container) before cutting into squares and serving!

My Easter Menu this year is....Ham (cooked in the crock pot with a apple juice and brown sugar glaze), Candied Yams, Green Beans or Broccoli and Cheese?? and Homemade Rolls! With my lovely left over Lemon Delight for dessert! What are you making or eating....whatever the case may be???
God Bless and Happy Easter!
Mama D
Thursday, April 21, 2011
$5 Easter Dress for the Bear!
Hi Folks,
Well let me tell you a little something about my Bear....she is chunky! Yes I am working on this....I do have her on a sort of diet...I watch her portions...try to make sure she eats healthy....I control her intake of sugar...but she is still chunky! And added to that she inherited her Daddy's chest! My 6 1/2 year old has a 38 inch chest! And it's not fat it's just that she is that thick in that area of her body. So pair that with the chunky factor....it is nearly impossible to find clothes that fit this child! I have had the hardest time the last two years find just basic school clothes! Now she is chunky enough I can't buy from the girl's section and the Junior department just scares me!
So......yet again I am grateful that I have a Crafty Momma that passed on her smarts and her genes when it comes to making stuff! My 6 year old loves to dress up on Sunday's! Now we go to a come as you are, dress up if you want to...but Jeans are fine kinda of church. So fancy dresses are not required. I normally get away with letting her wear a cute skirt and tee shirt on Sunday mornings....but this year the Easter Dress bug has hit my little girl! And she wanted a DRESS! I guess Momma did too because I started looking a good two months ago with no success! I finally decided that I would just have to make her one!
Unfortunately we live 50 miles away from the nearest fabric store and gas prices are high. So when I happened to be near a fabric store I was low on cash and when I had the cash I couldn't justify the gas money to get me there and back! Sigh! So what did I do....well I started digging in my material box! See one of my teenagers USED to be my little sister...and my Momma did sew for her occasionally...and when she got to big I got the leftover material that Momma didn't use..... But she only sewed for her when she was 3 or 4 years old and most of the pieces of material that I had were less than 2 yards!!
Yet another issue....mmm...what's a Mama D to do??? Well you start searching for patterns that use multiple pieces of material or ones that use less than what you have.....considering my chunky kid....I really didn't think that I would find one that took less than 3 or 4 yards of fabric.
Then the light bulb went off! I have always liked making my girls those tee shirt dresses! When the Bear was a little toot I made her several! All you need was a tee shirt and a yard of fabric that matched! Easy Peasy!
But I wanted to do something a little fancier for Easter.....so I decided to mix my tee shirt dress idea with a tiered (some people call them broomstick) skirt! And because my kid is chunky and we like to camouflage that as much as possible I wanted it to be high waisted (or empire waisted).
First off you have to do some math for your skirt. I measured my daughter's chest/bust line and used that as a substitute for the waistline measurement.
OK let me back up a bit ....if you make the skirt a separate piece you have to allow for a casing for the elastic and you measure from you person's waistline....I made a empire waisted dress and attached a premade tee shirt to the top as a bodice...so I started at her bust line!
You take your bust line/waistline measurement and double it. Bear's was 38 inches so it came out to be 76 inches. This is how big you want your first tier. For the second tier you double that first tier's measurement and the same for the third.
Now to get how wide to make each tier, you want to measure your person and find out how long you want your skirt. I wanted a 30 inch skirt so my tiers were 10 inches each.
 I started with this tee shirt that I found at Walmart for $5! It fits my daughter well across the chest but is a little tight across the belly. So I decided a high waist that deemphized this area would be best!
 I laid the tee shirt on my Rotary mat and measured three inches down from the bottom of the sleeve. That gave me plenty of seam allowance for attaching the skirt! Now just set that aside till later and save the bottom of the tee shirt for another project!
 I found three pieces of material that I could use for this dress. I had a little less than a yard of this white piece and a little over two yards of a yellow piece and a green. Now the process and steps are the same for each piece of material so I am only going to write out these instructions once instead of repeating my self. If you have any questions please leave a comment and I will be happy to answer!
This first pic is showing that I cut just a little off the bottom of my piece of material to make sure it was even. This is always the first step I take anytime I use my rotary mat and cutter....if things are even in the first place it will save you a headache in the long run!
 Then I cut as many 10" strips as I could out of each piece of material.
**Note....Most of you can skip the next step or two...since I was using what I had and didn't buy what I needed I didn't think I would have enough of each color to make my tiers so I was going to mix them to get enough....however when it came down to it I had enough to do each tier in a separate color....so I added some work to myself...but learned a neat trick in the process!
 I then cut each strip into as many 10 inch by 11 inch squares that I could. As I said earlier I thought I was gonna mix them all up and the figured out that I didn't have too! I ended up with 16 white squares, 32 Yellow squares and 28 Green Squares.
***Note...OK I did make a mistake here....I should have made all my Green squares a little bigger to allow for the hem...I didn't so I just made do...I knew that if it looked too funny I could always add a little lace to the bottom! Mama D is NOT a perfectionist!!
OK now that I have all my cutting done....we need to start sewing. I have already explained how you figure out big around you need to make each tier. And since each of my squares was 10 inches wide....that made my job pretty simple. I just used 8 squares for my first tier (that's 80 inches and pretty close to the 76 that I needed...this is a gathered skirt so a little extra material just makes it fuller!), 16 squares of the yellow and all of the green!
**Now if you didn't cut all your strips apart like I did...you would just have to measure each strip and use as many as you needed to make your tier. Sew each strip together until you made a circle and follow the rest of the steps.
And yes I realize that 16 plus 16 is 32 and I had 32 yellow squares and only 28 green ones....but it just didn't look right with the green in the middle....and as I pointed out before...it's a gathered skirt...it will just be a little less full on the bottom...and it turned out plenty full!
I then sewed each square together to form my tiers. When all my tiers were formed ....I started assembling them. For this type skirt it is easier to work from the bottom up. And for those of you who have sewn in the past I did something entirely backwards....I started with my hem.
 This is my Momma would shake her head, my Grandmother would be horrified and my Home EC. Teacher would have flunked me Hem. I am a lazy sewer....and I don't like handwork...if I can't do it on my machine I would really rather not do it at all....so I have come up with the following method of sewing a hem. First you run a Zig Zag stitch around the bottom of the garment. Heat up your iron and ironing board. then I take said garment and press the zig zaged portion of the hem up all the way around (about 1/4") then I go back and press a second time to get the depth of hem I need for the garment I am makings....this one I did about a 1" hemline. Now you can use your measuring doohickey and get this even all the way around....I just eye balled it...because in all my moving I have misplaced my measuring doohickey and my seam ripper! Then I take my garment to the sewing machine an straight stitch all the way around the top of my hem! Quicker, Easier and much less time consuming than doing it by hand! You however create your hem however you would like!
 Now you want to run your basting stitches (two of them) across the top of your tier. I learned the hard way that you want to do these in about 18" stretches....if you try to go half way around like I did on the first one...you will be pulling your hair out before you get them all gathered and pinned!
After basting you want to start by gathering you material just a little and pining it to the next tier. This is where mine being in 10" squares came in handy....it made getting everything onto the next tier easier because it was premeasured. I generally start by pinning the sides together, then I divide that in half and pin it at the half way mark...I continue doing this until I have my material in manageable sections. I then gather and pin each section as evenly as possible and when I get done it generally requires little adjustment!
When everything is pinned to your liking....sew a 5/8" seam all the way around the tier and finish the seam by Zig Zagging right next to it on the inside. Also remove you basting stitches.
You will repeat these instructions for tiers #2 and #1. #1 of course will be attached to the tee shirt! I also finish all my seams with a zig zag and trim each as needed to cut down on a little of the bulk around the tiers!
When I was done this is what my very happy little girl twirled around the kitchen with her proud Daddy looking on!
 Please excuse the wet hair ....she had just gotten out of the bathtub!
Did I mention that this dress only cost me $5 for the tee shirt?? Well it did...even if you didn't have the fabric stashed away like I did it would only cost you a couple of yards of material and a little imagination. Of course the bigger the person the more material you will need. But my little one just loves her new Twirly Easter Dress that Mama made her...and Daddy just loved the price!
If you have any questions feel free to contact me....I am sorry for the lack of pictures on some of the steps...I got busy sewing and forgot to take pictures! Now I have to go get busy on some short for this kid! All the shorts I have found this season are too short....if they don't come down to her knees my 6 year old is not wearing them....but I am not gonna make her wear pants all summer! So I guess that BIG piece of denium I found the other day (I think I was gonna make a maternity dress out of it way back when) is gonna make my little girl some much needed shorts!
I hope you all have a very blessed Easter weekend!
God Bless,
Mama D
Well let me tell you a little something about my Bear....she is chunky! Yes I am working on this....I do have her on a sort of diet...I watch her portions...try to make sure she eats healthy....I control her intake of sugar...but she is still chunky! And added to that she inherited her Daddy's chest! My 6 1/2 year old has a 38 inch chest! And it's not fat it's just that she is that thick in that area of her body. So pair that with the chunky factor....it is nearly impossible to find clothes that fit this child! I have had the hardest time the last two years find just basic school clothes! Now she is chunky enough I can't buy from the girl's section and the Junior department just scares me!
So......yet again I am grateful that I have a Crafty Momma that passed on her smarts and her genes when it comes to making stuff! My 6 year old loves to dress up on Sunday's! Now we go to a come as you are, dress up if you want to...but Jeans are fine kinda of church. So fancy dresses are not required. I normally get away with letting her wear a cute skirt and tee shirt on Sunday mornings....but this year the Easter Dress bug has hit my little girl! And she wanted a DRESS! I guess Momma did too because I started looking a good two months ago with no success! I finally decided that I would just have to make her one!
Unfortunately we live 50 miles away from the nearest fabric store and gas prices are high. So when I happened to be near a fabric store I was low on cash and when I had the cash I couldn't justify the gas money to get me there and back! Sigh! So what did I do....well I started digging in my material box! See one of my teenagers USED to be my little sister...and my Momma did sew for her occasionally...and when she got to big I got the leftover material that Momma didn't use..... But she only sewed for her when she was 3 or 4 years old and most of the pieces of material that I had were less than 2 yards!!
Yet another issue....mmm...what's a Mama D to do??? Well you start searching for patterns that use multiple pieces of material or ones that use less than what you have.....considering my chunky kid....I really didn't think that I would find one that took less than 3 or 4 yards of fabric.
Then the light bulb went off! I have always liked making my girls those tee shirt dresses! When the Bear was a little toot I made her several! All you need was a tee shirt and a yard of fabric that matched! Easy Peasy!
But I wanted to do something a little fancier for Easter.....so I decided to mix my tee shirt dress idea with a tiered (some people call them broomstick) skirt! And because my kid is chunky and we like to camouflage that as much as possible I wanted it to be high waisted (or empire waisted).
First off you have to do some math for your skirt. I measured my daughter's chest/bust line and used that as a substitute for the waistline measurement.
OK let me back up a bit ....if you make the skirt a separate piece you have to allow for a casing for the elastic and you measure from you person's waistline....I made a empire waisted dress and attached a premade tee shirt to the top as a bodice...so I started at her bust line!
You take your bust line/waistline measurement and double it. Bear's was 38 inches so it came out to be 76 inches. This is how big you want your first tier. For the second tier you double that first tier's measurement and the same for the third.
Now to get how wide to make each tier, you want to measure your person and find out how long you want your skirt. I wanted a 30 inch skirt so my tiers were 10 inches each.


This first pic is showing that I cut just a little off the bottom of my piece of material to make sure it was even. This is always the first step I take anytime I use my rotary mat and cutter....if things are even in the first place it will save you a headache in the long run!

**Note....Most of you can skip the next step or two...since I was using what I had and didn't buy what I needed I didn't think I would have enough of each color to make my tiers so I was going to mix them to get enough....however when it came down to it I had enough to do each tier in a separate color....so I added some work to myself...but learned a neat trick in the process!

***Note...OK I did make a mistake here....I should have made all my Green squares a little bigger to allow for the hem...I didn't so I just made do...I knew that if it looked too funny I could always add a little lace to the bottom! Mama D is NOT a perfectionist!!
OK now that I have all my cutting done....we need to start sewing. I have already explained how you figure out big around you need to make each tier. And since each of my squares was 10 inches wide....that made my job pretty simple. I just used 8 squares for my first tier (that's 80 inches and pretty close to the 76 that I needed...this is a gathered skirt so a little extra material just makes it fuller!), 16 squares of the yellow and all of the green!
**Now if you didn't cut all your strips apart like I did...you would just have to measure each strip and use as many as you needed to make your tier. Sew each strip together until you made a circle and follow the rest of the steps.
And yes I realize that 16 plus 16 is 32 and I had 32 yellow squares and only 28 green ones....but it just didn't look right with the green in the middle....and as I pointed out before...it's a gathered skirt...it will just be a little less full on the bottom...and it turned out plenty full!
I then sewed each square together to form my tiers. When all my tiers were formed ....I started assembling them. For this type skirt it is easier to work from the bottom up. And for those of you who have sewn in the past I did something entirely backwards....I started with my hem.


After basting you want to start by gathering you material just a little and pining it to the next tier. This is where mine being in 10" squares came in handy....it made getting everything onto the next tier easier because it was premeasured. I generally start by pinning the sides together, then I divide that in half and pin it at the half way mark...I continue doing this until I have my material in manageable sections. I then gather and pin each section as evenly as possible and when I get done it generally requires little adjustment!
When everything is pinned to your liking....sew a 5/8" seam all the way around the tier and finish the seam by Zig Zagging right next to it on the inside. Also remove you basting stitches.
You will repeat these instructions for tiers #2 and #1. #1 of course will be attached to the tee shirt! I also finish all my seams with a zig zag and trim each as needed to cut down on a little of the bulk around the tiers!
When I was done this is what my very happy little girl twirled around the kitchen with her proud Daddy looking on!

Did I mention that this dress only cost me $5 for the tee shirt?? Well it did...even if you didn't have the fabric stashed away like I did it would only cost you a couple of yards of material and a little imagination. Of course the bigger the person the more material you will need. But my little one just loves her new Twirly Easter Dress that Mama made her...and Daddy just loved the price!
If you have any questions feel free to contact me....I am sorry for the lack of pictures on some of the steps...I got busy sewing and forgot to take pictures! Now I have to go get busy on some short for this kid! All the shorts I have found this season are too short....if they don't come down to her knees my 6 year old is not wearing them....but I am not gonna make her wear pants all summer! So I guess that BIG piece of denium I found the other day (I think I was gonna make a maternity dress out of it way back when) is gonna make my little girl some much needed shorts!
I hope you all have a very blessed Easter weekend!
God Bless,
Mama D
Garden Time!!!
Well Folks I told you a while back that I was gonna put in a garden this year....and I planted (with a lot of help from my Daddy!) most of my garden last week! I am happy to announce that now 7 days later and on wind storm later I still have most of my garden! As I watered today I notice little heads polking up out of the ground! Hopefully the Donkey named Spot's trek through my garden didn't hurt anything!
I had started seeds in the house for my tomatoes, peppers and some onions....unfortunately the wind and my lack of know how took care of those and they died a quick death....But my Daddy being my Daddy has promised to buy me some plants to replace them and we will try the heirloom plants again next year! I think Daddy and the Tool Man are as excited about this whole thing as I am! They want all the heirloom and non hybrid plants....I just want something to put on the dinner table that I don't have to buy!
 As You can see our Potatoes are growing good. Tool Man planted these in March....now he is really bad about mixing the varieties together...so I am not quite certain what will come out of the ground at the end of the growing season....but we should have plenty! I want to try growing these in a trash can one year...has anyone tried that method????
 Even though the picture is sides ways these are our onions....now I didn't start these...we bought the bunches from the feed store ....but they are doing good as well!
 I am pretty sure this is a side ways picture of the garlic that Tool Man planted too! He said that some of it was jumbo! I love cooking with garlic but prefer to get it in a jar already minced so that my hands don't forever smell of garlic! But I am sure I will use this and enjoy it!
 My very inventive hubby built this enclosure for me to have as a mulch pile! I just love it! If you couldn't tell by the picture we have a lot of sand...and our garden is mostly sand.....so we have a lot of work to do getting the soil better able to handle a garden! One of these days it will be awesome....however for the time being I am gonna be grateful for what we receive from our labors!
Luckily between the cows and the chickens....natural fertilizer shouldn't be a problem next year!
Do you have a Garden??? What did you plant??
I have Potatoes, Onion, Garlic, Corn, Green Beans, Zucchini, Yellow Squash, Carrots, and Okra. Hoping to have some lettuce, beets, radishes, tomatoes, and peppers planted by tomorrow afternoon!
God Bless,
Mama D
I had started seeds in the house for my tomatoes, peppers and some onions....unfortunately the wind and my lack of know how took care of those and they died a quick death....But my Daddy being my Daddy has promised to buy me some plants to replace them and we will try the heirloom plants again next year! I think Daddy and the Tool Man are as excited about this whole thing as I am! They want all the heirloom and non hybrid plants....I just want something to put on the dinner table that I don't have to buy!


Luckily between the cows and the chickens....natural fertilizer shouldn't be a problem next year!
Do you have a Garden??? What did you plant??
I have Potatoes, Onion, Garlic, Corn, Green Beans, Zucchini, Yellow Squash, Carrots, and Okra. Hoping to have some lettuce, beets, radishes, tomatoes, and peppers planted by tomorrow afternoon!
God Bless,
Mama D
Tuesday, April 12, 2011
Easy Alfredo Sauce
Ahh...now this is truly an easy recipe!!! My 6 year old LOVES Fetticini Alfredo!!! And when I found this homemade EASY recipe on Heavenly Homemakers I knew that it would become one of hers! Bear just loves to help me in the kichen....Mommy has to take a deep breath and pull in a lot of patience to let her help me...but it is always worth the effort! With just a little help from me she managed to make this recipe on her own!
Easy Alfredo Sauce
1/2 cup butter
2 cups cream (we used a pint of half and half)
1 clove garlic
2 tablespoons cream cheese
1/2 cup grated parmesan cheese
Bring the butter, cream, garlic and cream cheese to a boil. Turn down the heat, simmer and stir for about 2 minutes. Add the grated cheese and stir until melted. Simmer the sauce for 15-20 minutes until it becomes "thick and saucy" stirring occasionally.
This wonderful recipe can be found on the Heavenly Homemakers site! Laura's recipes are always good!
The Bear and I didn't have any fetticine noodles but we did have some fun wavy spagehtti noodles that worked just fine! She gave it a big thumbs up and ate it three different days till it was all gone!!!
God Bless,
Mama D
What We Ate Last Week
Well as usual...what I planned to cook and what I actually cooked were two different things last week! I did manage to try out some new recipes, several in fact.
Sunday - Frito Pies
Monday - Enchilada Casserole, Pinto Beans and Corn
Tuesday - I honestly cannot remember!!!
Wednesday - Pancakes
Thursday - Fried Chicken Fingers, Baked Beans and Potato Salad
Friday - Fettuccine Alfredo (tried a recipe for Easy Alfredo Sauce, Yummy!)
Saturday - Chicken Tacos...these didn't go over well because I used corn tortillas instead of flour!
I realized on Saturday how much I miss watching cooking shows off the Food Network and such! It's not that I have access or the desire to us some of the ingredients that they do...but they do spark my imagination to use what I do have in new and sometimes interesting ways! For Example ....I received a email from the Pioneer Woman the other day with a recipe for Chicken Tacos....which were really chicken breast wrapped in a corn tortilla then deep fried in oil before being served.....then I watched a cooking show about Mexican Tacos on PBS Saturday morning and saw all the interesting things they consider to be fillings for tacos. The man on the show then proceeded to make a taco filling with chicken, onion, chard and several other things. This inspired me to make my own version of both of these recipes. I cooked my seasoned chicken breast in olive oil in my cast iron skillet. Then used the drippings off the chicken to cook my fresh onion, garlic and a little green chilies. I then combines my onion mixture with my chicken and placed both on a corn tortilla and deep fried it for just a minute before serving with cheese and sour cream. My corn tortillas needed salt and were rather bland...but the chicken and onion mixture was excellent! I gave one to the hubby on a flour tortilla and he loved it! But my family didn't care for the corn tortillas... However I felt inspired like I haven't in a long time! What inspires you???
God Bless,
Mama D
My Man Cookies
My Man Cookies are an absolute favorite in this family! If we need some comfort food around here that's what I make! They are (if you bake them right) soft and chewy sweet deliciousness! And when I say family favorite I mean the whole family. Two of my uncles come begging during the holidays and are disappointed if they don't get to take home gallon sized bags full of cookies....which they procede to hide from their grown sons! One uncle even renamed them "Kill A Man" Cookies, because he claimed that you could eat enough to Kill A Man! Enough of my ramblings....here's the recipe!
My Man's Cookies
1 cup shortening
1 cup brown sugar
1 cup white sugar
2 eggs
2 teaspoon vanilla
1 cup chopped nuts
2 cups flour
1 teaspoon baking soda
1 teaspoon salt
1 teaspoon baking powder
2 cups oats (quick or old fashioned)
1 cup coconut
Beat shortening and sugars until creamy. Blend in eggs and vanilla. Sift dry ingredients and add to creamed mixture. Stir in oats, coconut and nuts. Pinch off dough in balls.(I use a small scoop) Place on lightly greased cookie sheet or one lined with parchment paper. Bake at 350 degrees for 8 to 10 minutes.
Mama D's Tips
*Undercook these cookies just a little bit to retain that chewy softnes....I bake mine for 8 mintues....the upper portion of the cookie will be starting to brown but the inner portions will look undone...I go ahead and take them out of the oven and let them finish baking on the cookie sheet for 1 to 2 minutes before removing them...they should be a lite golden brown!
*If you like a crisp cookie go ahead and bake these the full 10 minutes or until they are uniformly brown!
Monday, April 4, 2011
What We Ate Last Week
What We Ate Last Week....
Well me being me came up with the great idea to tell you what we actually ate for the week instead of what I planned to cook for the upcoming week....and I have failed to post this the last couple of weeks. Mainly because I haven't really followed any sort of menu plan, lots of things have been happening and I have just generally not felt like menu planning, or cooking, or cleaning...you get the idea. So I am sorry that I failed in my mission. I how ever have learned a very important lesson....the only way I can stick with my budget, make good healthy meals for my family and not fail into the trap of take-out...is to Menu Plan! At least loosely! Having a general idea of the ingredients that I have in the pantry and freezer with a few adaptable meals planned around those ingredients, helps!!! Also considering that I am in that dreaded first trimester of pregnancy...where I literally have days where all I want to do is sleep..having quick and easy stand bys is essential!
Now for those of you that don't know I bake bread about once a week....as I am down to one loaf...my baking day will be tommorrow! I generally make about 4 to 8 loaves a week....depending on what is going on that week. Yes I know that 8 loaves of bread is a lot! But I keep some on hand in the freezer for those friends that want to buy a couple of loaves, for gifts or just to take over to Momma and Daddy's house! So some weeks I make more than others to keep my stock up!
Breakfast is pretty simple around here....The Bear eats Cold cereal, I generally eat hot cereal and the men folk want eggs, bacon or sausage and toast or biscuits. And when I am in the mood I make pancakes, waffles, sausage gravy or omlets.
Breakfast is also one of those fall back meals....I make bacon or sausage on a daily basis anyways, eggs are always in the fridge and I rarely run out of bread! So when I am tired we eat breakfast for dinner!
Last week Teenager #2 was home for Spring Break so I tried to make as many meals that she liked as possible! I only get to spoil her on occassion and I cook differently than her Mom and Step-Dad do....so the week was full of food that Teenager #2 likes.
Sunday -Fried Chicken and Rotisserie Chicken, Fried Okra, Mashed Potatos and Green Beans (we were in a hurry after church so hit the Deli at United)
Monday - Oven Grilled Steaks, Baked Potatos and Broccoli and Cheese
Tuesday - Spaghetti, Corn and Garlic Bread
Wednesday - Stuffed Pasta Shells, Corn and Green Salad
Thursday - Smothered Hamburger Patties, Fried Potatos and Homestyle Green Beans
Friday - Beef With Peppers
Saturday - What Ever We Could Find!
This week...well My Lil' Brother is having his tonsils removed so towards the end of the week we will be doing lots of soups and soft foods....but I will post anything new throughout the week!
Praying that you have a blessed week ahead,
Mama D
Lilla Rose

http://www.lillarose.biz/BeautifulLife
The above Link will take you to a consultant named Paula Ramm's website where there are videos explaining how these Flexi clips work! I love mine!!!
So go check it out even if you are just curious and don't have hair long enough to fool with...they make wonderful gifts!!!
God Bless, Mama D
Friday, April 1, 2011
Beef With Peppers
Beef With Peppers
Linky to recipe!
The Pioneer Woman's Beef With Peppers
This is what I fixed for lunch this afternoon. It was so easy!!!
Now me being me...and living a a small town...I couldn't find the rice noodles that she used in her recipe! BUT I subsituted Egg Noodles and they did just fine! I also used some fajita meat that I found on the clearance rack at United instead of the flank steak....and I am pretty sure I left out one or two of the ingredients in the marinade.....but not enough to really call it a new recipe! It was fantastic....The Bear even ate it and didn't notice all those onions in with the noodles!!!
This is definatly a keeper in my book!
God Bless,
Mama D
Subscribe to:
Posts (Atom)